
This is Part Two of my “Iris Post”. FYI, when I explore a new (to me) plant for dye potential, I sometimes enjoy a little play at Kinder Chemistry. Three jars are set up for solar soaking: Jar 1: water; Jar 2, water with alum; Jar 3: water with ammonia. Into each goes the plant material and the resulting colours are; purple (water plus iris, no alum): turquoise green-blue (water and alum plus iris) greenish (later, yellow): water and ammonia, plus iris. (The jar of red in the pic is corepsis, for another post)

Below: El Camino de los irises:
Iris on alum mordanted vintage silk. The greenest parts are from the calices; the yellows from the “beards” or pollen bearing parts.

Close up:

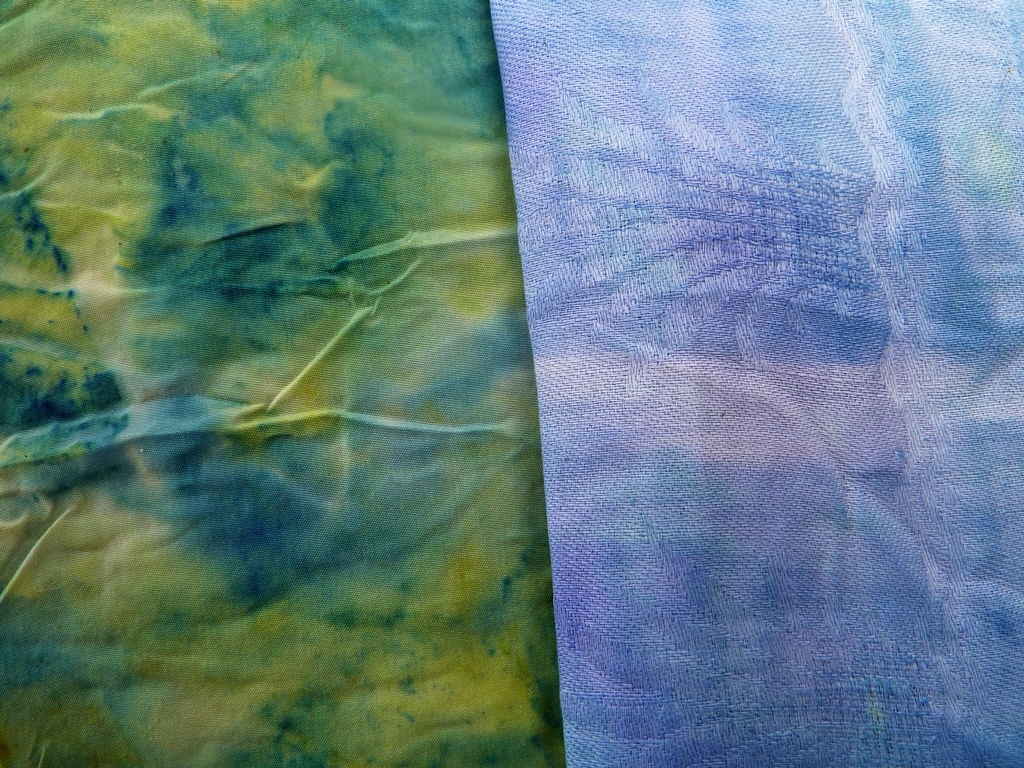
The same on an 80% wool-20% silk mix:


Close up: Now this is green!

The alum mordanted silk, steamed, on the left. Iris juice finger-smooshed onto vintage linen, no heat, on the right. (Your fingers go seriously blue)
Below: Smooshed iris on mordanted linen (L) No heat.
Smooshed iris on unmordanted linen (R). No heat.

Below:Pounding, grinding, squeezing, treading the blossoms: with and without heat processes.


Pounding with a rock: damp linen, unmordanted. The colours separate – that happen mostly from various colours coming from the different plant parts. Colour also comes from various dye component chemicals in the blossoms that separate out in the process.

Below: With coreopsis (red-orange) on found paper, Iris sibirica, pounded on after other plant colours were steamed on; mordanted with alum.

Lower left: sumac and coreopsis with iris on mordanted silk, a tad of rusty iron. Note the purples.
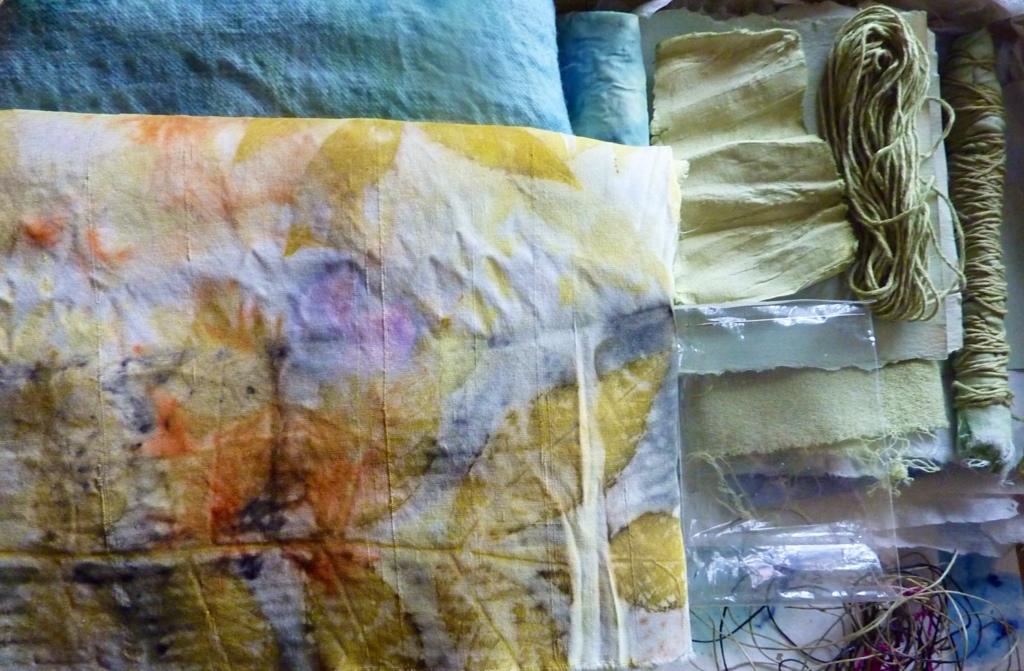
Upper right, cotton string in an iris dye bath, mordanted: paper, ditto (moss greens)
Iris sibirica on linen, treaded in (that is my left foot, lower left.) Yellows from the anthers and stamens.


Next time: the third iris post – about the “hapazome” ( pounded, treaded) length of linen and the frozen blooms. We are away for five days and the iris will be gone gone by then, no stagglers. So whatever is left of the June 2013 crop will go into the freezer. More printing a dyeing on top some artist books to finish
It has been lovely working with the iris
Wendy

Those colours are beautiful and I like your experiments.
Two fascinating posts, thank you. I don’t have blue iris but do have yellow pond irises, I might give these a go though they will probably have to go in the freezer for a while due to lack of time at the moment.
I also have a new iris which is browny purple when I get more blooms I will have to try that on as well.
Thanks, Debbie. Hope your iris will give up their secrets later!
Every new season is an adventure with natural dyes, that is for sure. We have lots of yellow flag iris hereabouts, too. They grow wild and for the most part, in places protected from gatherers. On the other hand, In some parts of the world, yellow flag is on the noxious weed list! Not quite sure of their status in the Ottawa Valley – protected, I believe. I have gathered dried out yellow-brown hybrids from friendly gardens and will try them later. One never knows what colours will emerge from an iris petal…little wonder the Ancients named them for the goddess of the rainbow!
http://www.wendyfeldberg.ca http://www.wendyfe.wordpress.com
Wendy, i love the clear wonderful colours–and your clear wonderful explanations! I had forgotten about Iris as goddess 🙂
I did not realize that iris were so well appreciated by the ancients
arlee,
I think I am wrong about Iris as a goddess…she was a “divinity”, though, a messenger, I think. Will check and post
Wendy
Thanks so much for documenting your experiments, Wendy. I find it all fascinating! And incredibly beautiful.
It truly is a fascinating field of study, as you say, Louisa. I do not think I can tire of it easily – it will be a lifelong connection to gardens and gardening, anyway
Hope you can have a go, too. Louisa!
Love this one too! I so much enjoy your adventures, inspirations and hard work!. Thanks!
My pleasure, Ginny!
Thank you. Ginny!
I am fascinated by the beautiful results you have achieved, but I’m resisting (no pun intended) playing with fabric dyeing for now. Until we can adjust the clock to include more than 24 hours per day, I can’t see where I can fit it in! Thanks for sharing.
Thanks, Terri. I know how you feel!
Thank you for this fascinating and informative post! Just by chance I tried one iris flowerhead last week; an autumn/winter flowering one. The colour green (and orange as well I think) appeared using alum and washing soda soaks on paper and cotton. I will post photos etc. I have been eco printing all summer and getting ready for shows so have neglected my blog – not for want of wishing to!
Hi Celia!
Thanks for this interesting feedback, adding to the deposit of knowledge! I am (slow in..) preparing a post on earth dyes of the kind you use…am going on a short course given by a conservator in a few weeks on the use of earth and plant pigments by Renaissance painters- will link to your blog and that of Sandy Webster, author of “Earthen Pigments”…impossible to present iris green or blue without mentioning the ochres as well as contemporary artists who are experimenting with them.
Wendy
http://www.wendyfeldberg.ca http://www.wendyfe.wordpress.com
Thank you for inspiring me at last to ‘have a go’. My first attempt at eco printing, after procrastinating for ages. A lot to learn but I have made a start!
Good for you, Tiggy! Once I started I couod not stop…
i am so enthralled with your results here!!! absolutely stunning and i am wondering if you will be selling any of your fabric…
The ahort answer is: probably I will HAVE TO as the eco prints are taking over my studio space faster than I can use them in series for shows etc in galleries…I have to laugh since I started eco printing as a way to reduce the load of vintage fabrics I have stashed over the years… Now I am simply adding to the pile …Etsy is likely the best therapy for my
kind of “collecting habit”… Thank you for asking, Jean.
please let me know when you etsy! i’d love to shop…as if i need more stuff… 🙂
i think you’d have a market for eco dyed kits with fabric, bits of paper, threads…i know i’d like one