June Dye Plants in July

Through many dangers, toils and snares I have come since last post, dear Reader! Pinched nerves, spine miseries, carpal tunnel syndrome have kept me away from blogland and the garden for too long….But TG for physio and MRI machines…Still, I had to save my mobility and energy for family visits (new baby), a family trip to the Muskokas and a couple of eco dye classes that I gave in June. But I did keep taking pics of the June dye plants growing in nicely without me fussing; so here are some of them ( even though we are half way through July) along with a few samples of eco prints done by students in June:

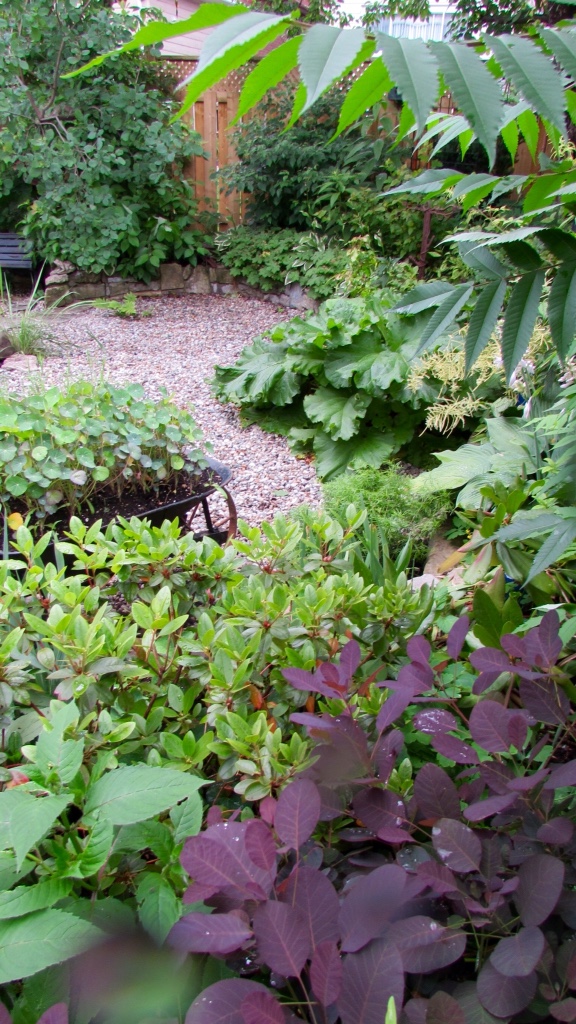
Cotinus coggygria (R) with Rhus typhina (above R); nasturtiums in the wheelbarrow ( for hapazome) and dogwoods by the fence.

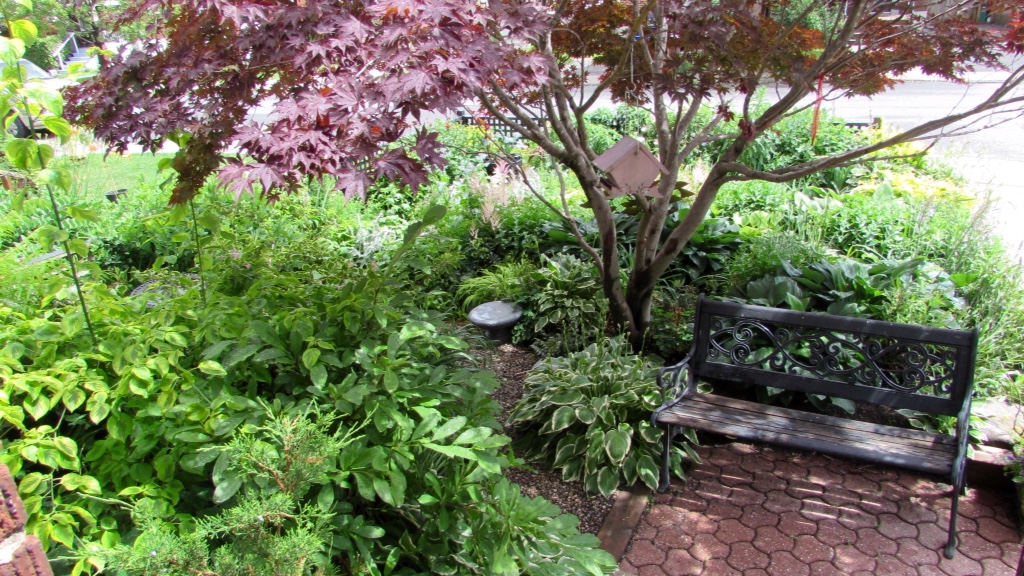
Front garden with the eco print star, red Japanese maple, probably “Bloodgood”

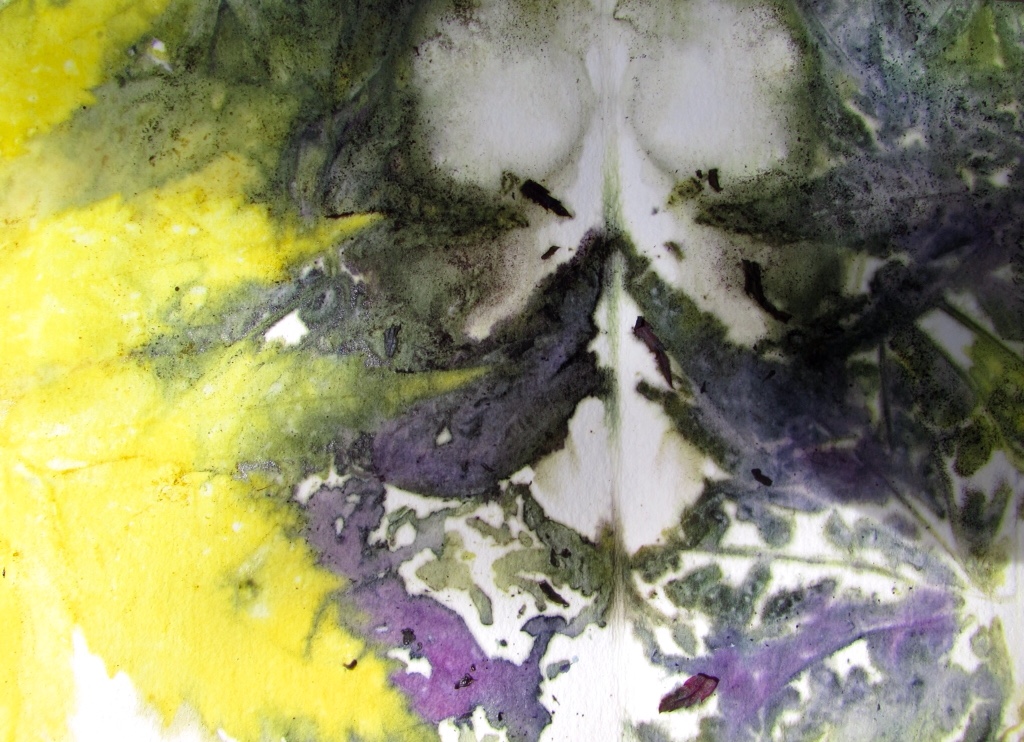
At this time of the year, this red leaved maple prints greens and purples. For complementary contrast, it is paired with yellow-primting sumac ( a student print).

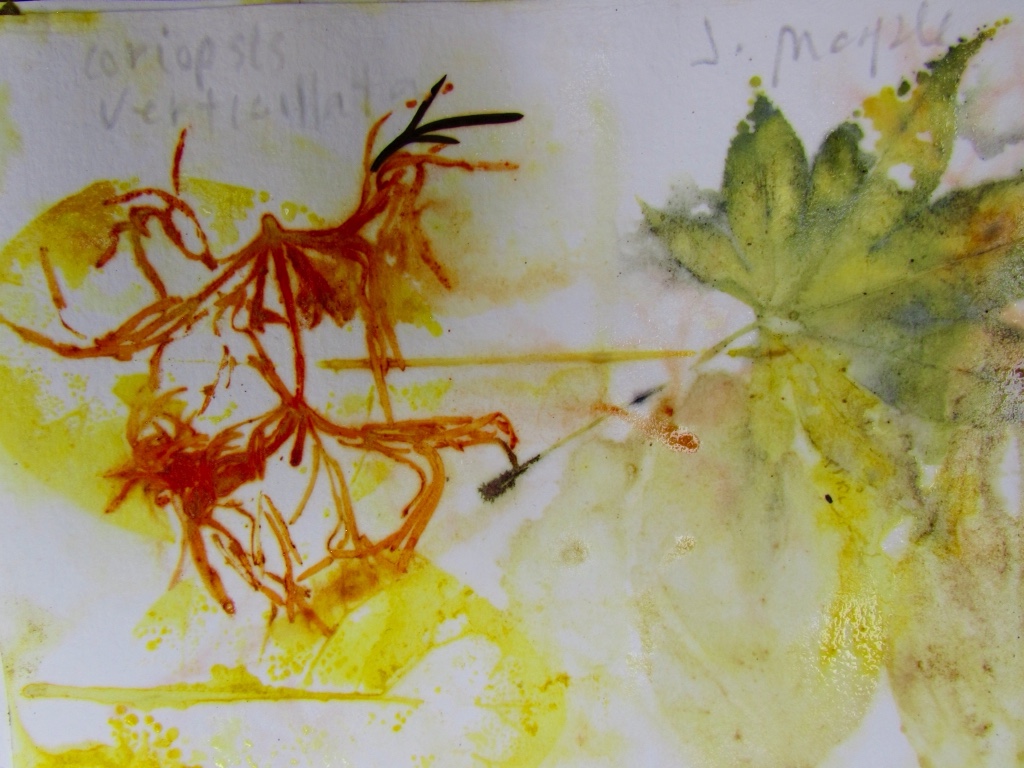
And here is the Acer palmatum again, this time green, with red Coreopsis verticillata as colour complement, and yellows from baptisia as analagous colours.

Coiinus surprises in June, with red coreo for a bit of sizzle:
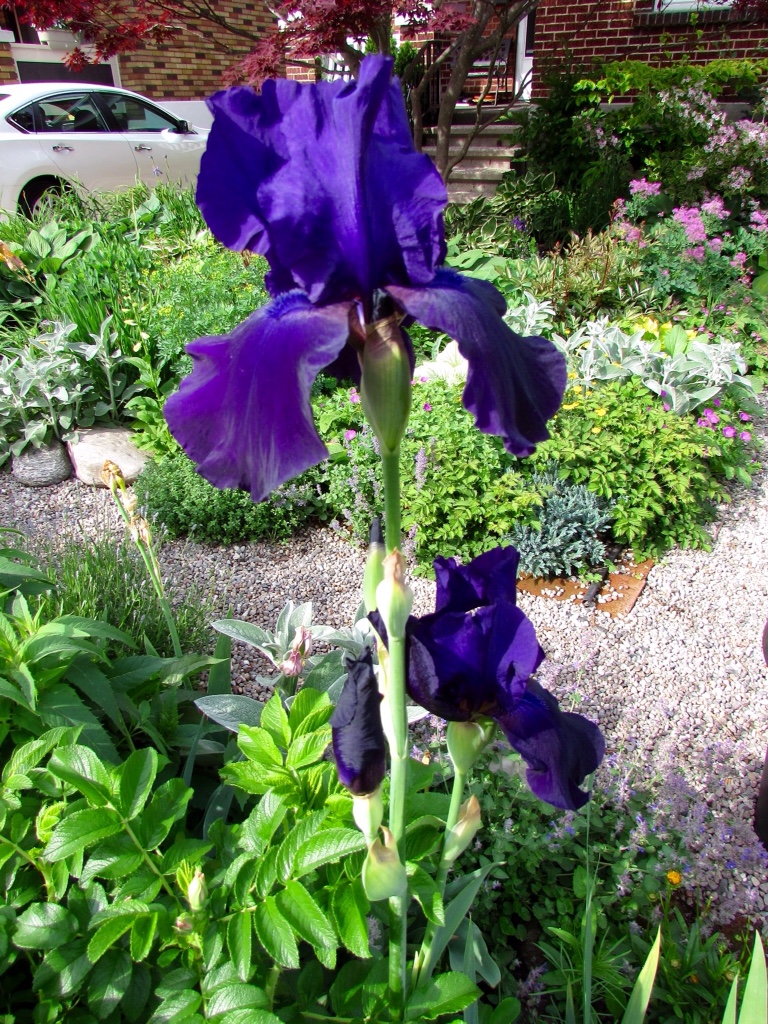
Iris always blue:

Tall bearded blue iris:

Baptisia australis: blue and purple blooms on the same plant! Fluorescent yellow from ththe leaves, deep blue stains from the little flowers:

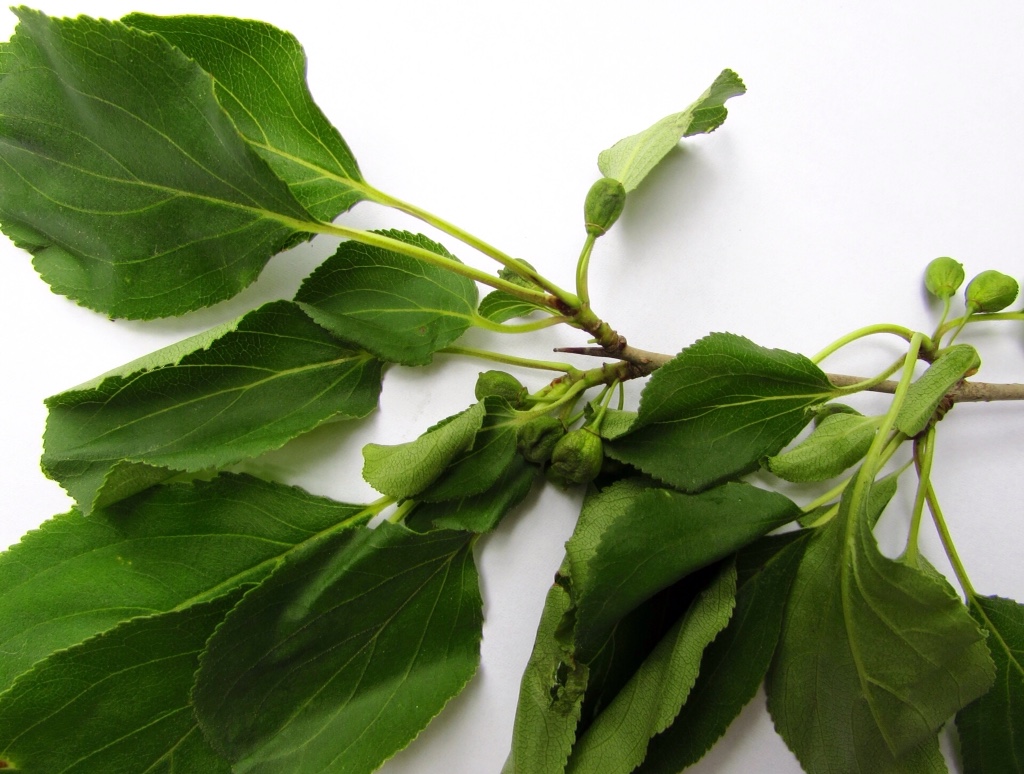
This plant is NOT in my garden: Rhamnus cathartica (buckthorn) is an invasive non-native soo fair game for June foraging. Green from the berries, a trad dye plant in Europe. The local Buckthorn Police were happy that this Most Wanted on their list had been hunted down…

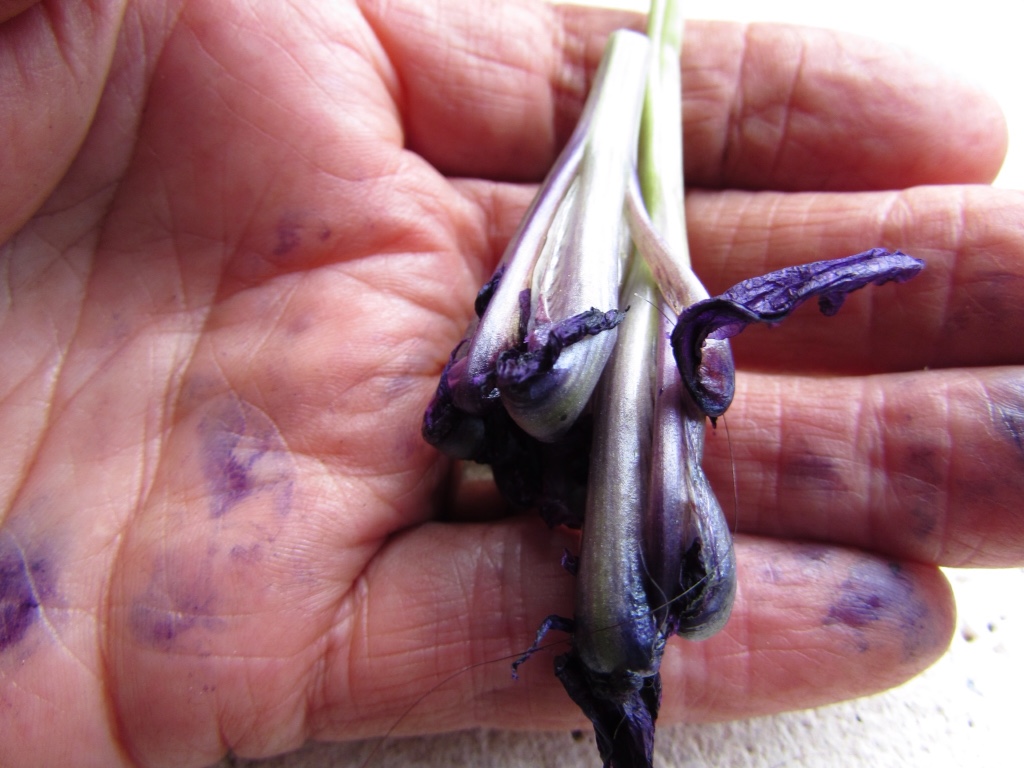
Japanese indigo ( Persicaria tinctoria): two overwintered plants that I layered and that consequently filled the whole planter: a plant with the will to live and leave a legacy; dye pot coming.

I still have loads of dried J. Indigo from last year, plus a 2014 vat that will get reactivated later this month:

The very well informed and generous mad dyers over at FB pageThe Wild Dyery have told us how we can get the vat going again.

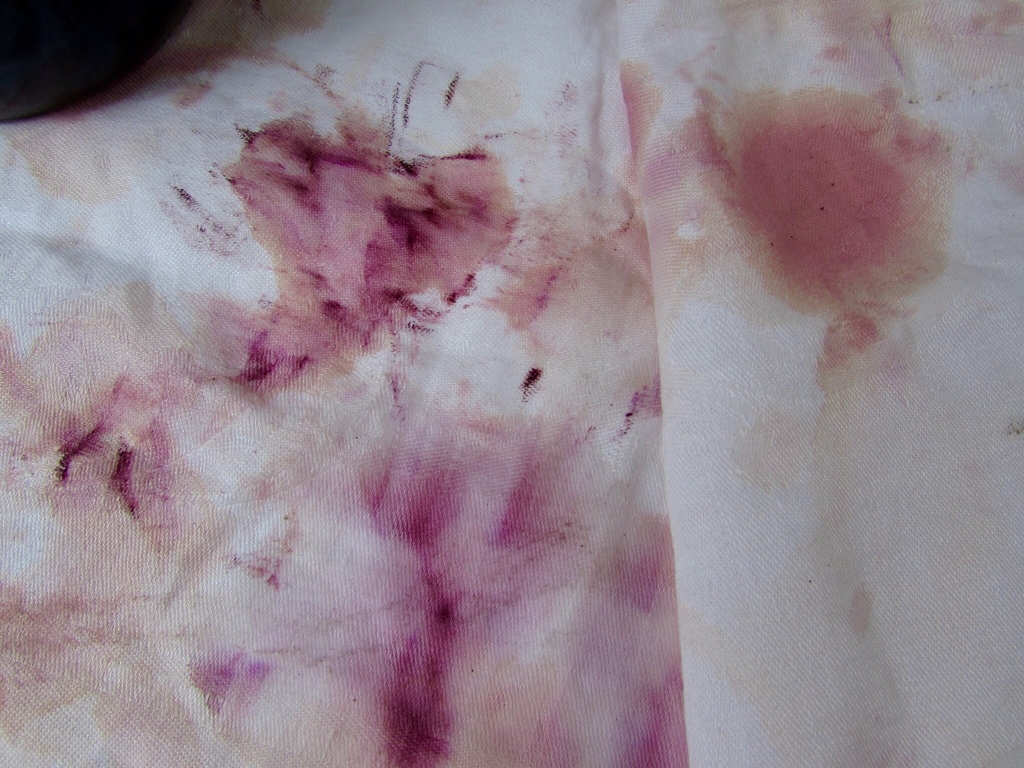
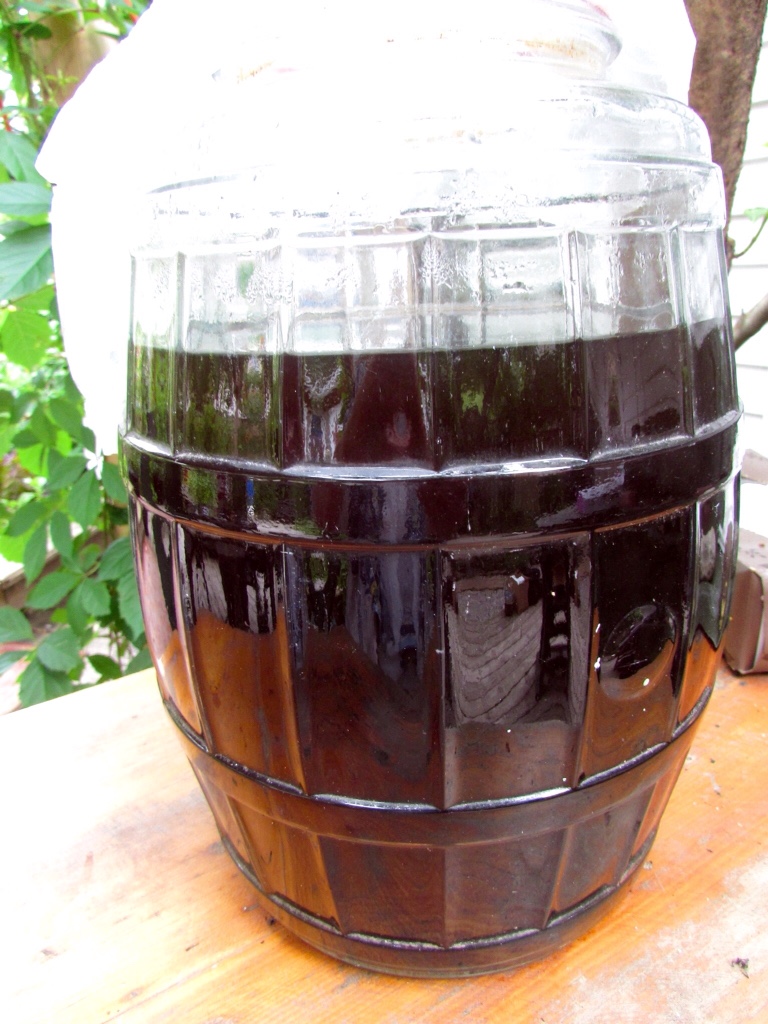
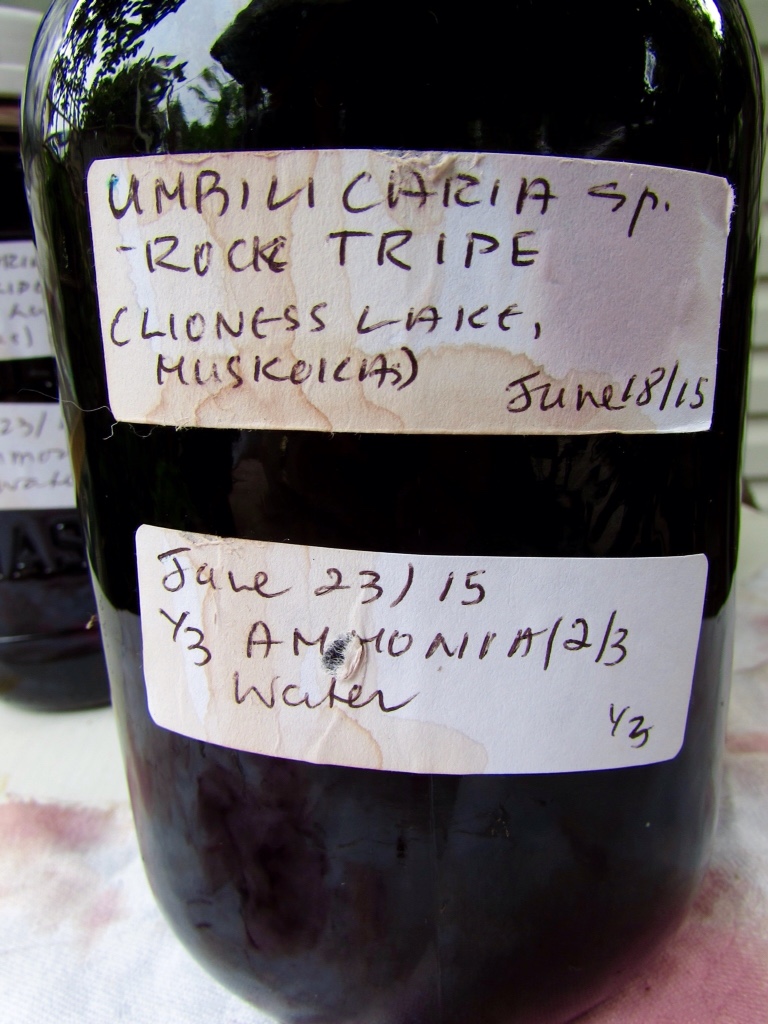
Above are prints from a lichen solar dye pot that I started on my return from the Muskokas where I found huge rocks covered in umbilicaria (Rock Tripe) lichen, and which our B&B owners allowed me to gather.

The liquor looks like rich red wine at the moment; I shake it to areate the jar each day and I catch the dye drips on a piece of linen under the jars. The underside of the lichen is green when wet.

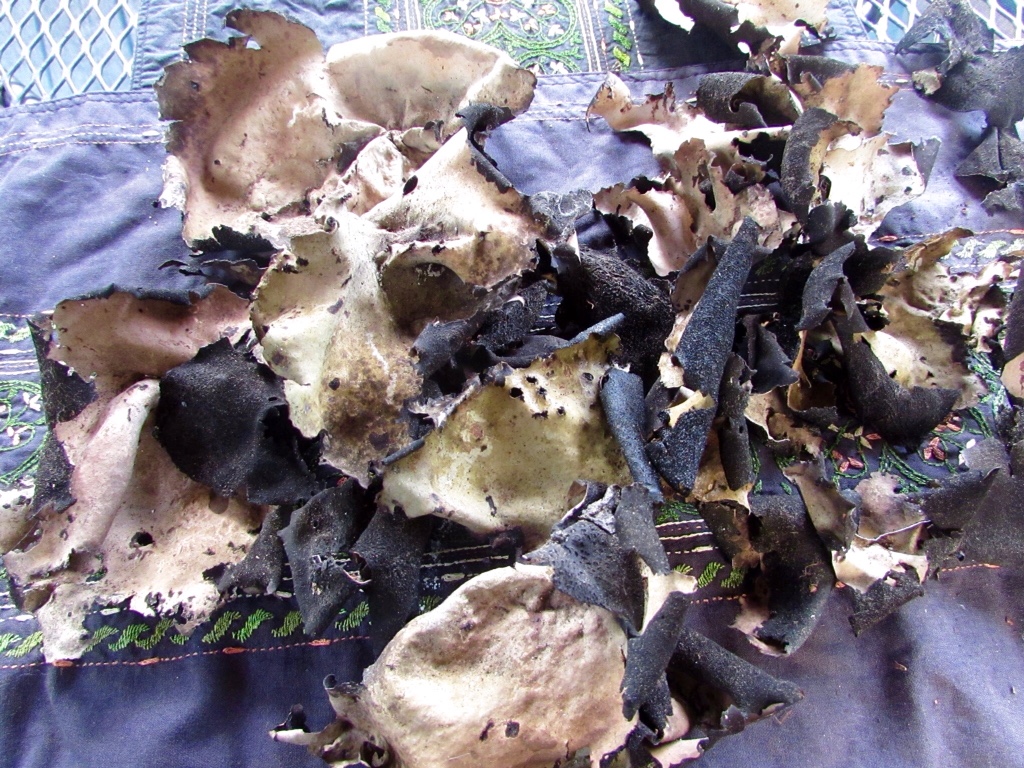
The umbilicaria, above. Not sure of the variety. FYI: The ethics of collecting lichen are in still in dispute. I feel comfortable having collected three small jars worth from over a large area on private property where a lot of the lichen has detached spontaneously from the rocks. The colour will fully develop in about six months.

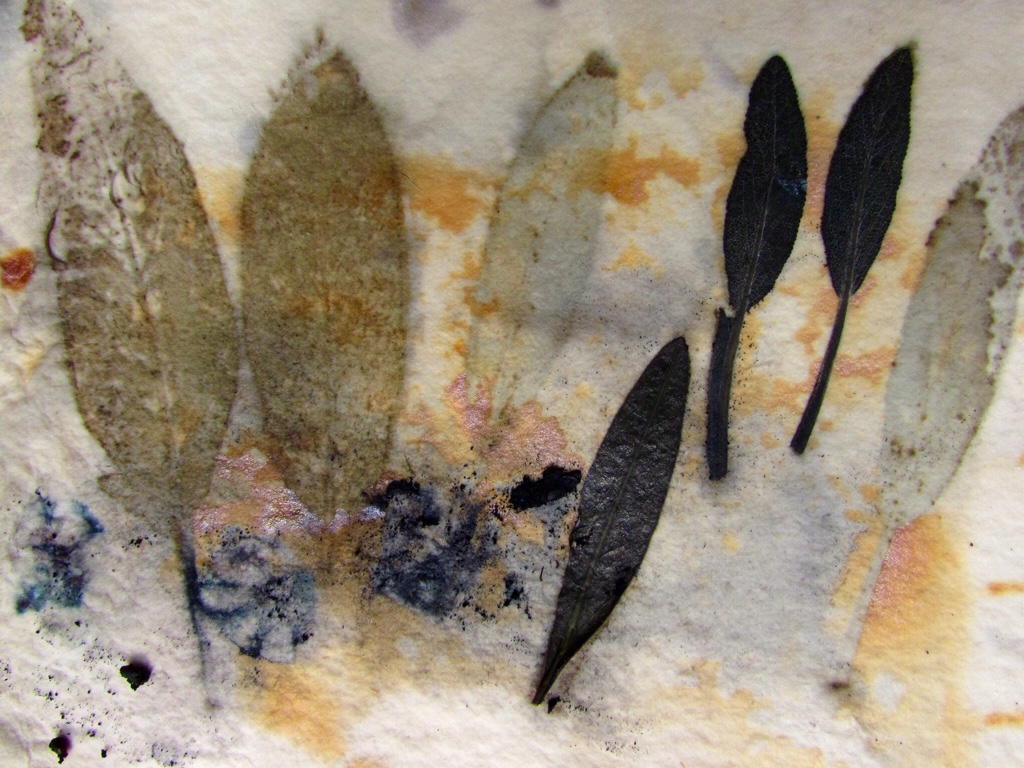
A lovely print by expert linocut printmaker and teacher Deidre Hierlihy who took a little eco print instruction session from me this month; print on handmade Canal paper by Saint Armand. Smooshed blue aronia berries with Salvia officinalis (culinary sage) and rust prints.

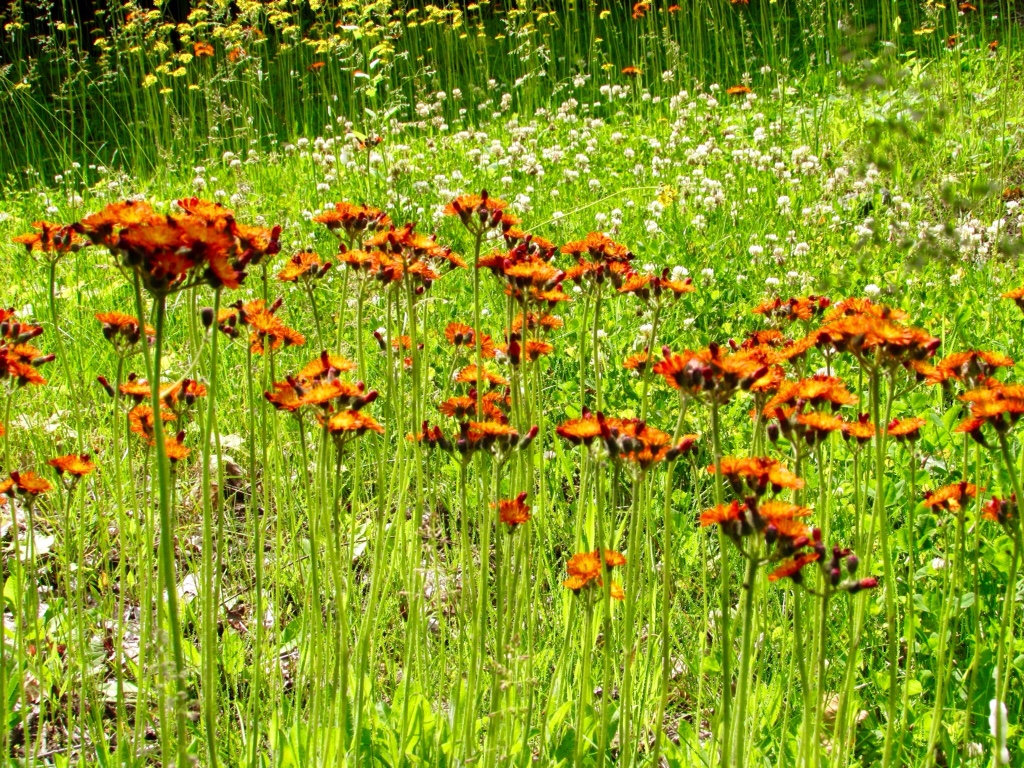
One of my favourite wild flower scenes in the Muskokas: orange Indian paintbrush (talleja) backed by white clover and tall yellow hawksweed. Native peoples used the talleja for pigments according to Moerman ( see my refs page)

Last pic is of ME, dear Reader. I have been reluctant to show my face and be somewhat personal, but I know you perhaps wonder who is speaking to you and what I might look like. So here I am, dressed for the photo and right after I had my grey hair dyed…I cannot tell a lie, paper was not the only thing that got dyed in June… I got these great copper-oxidised earrings from the kids for Mother’s Day; the kids insisted I send them a pic with me wearing them; so I am daring to share it with you. The earrings were made by the very talented young jeweller artist Shane Cook, a grad of NSCAD. Behind me in the pic are some of my embroideries. A couple of these works will soon appear in a text book about modern textile art embroidery published by the Hong Kong Polytechnical University.

Next post will be in July!


Wendy


Japanese indigo (Persicaria tinctoria) in the garden and the dye pot


This month, I made my first indigo vat, guided by an excellent article by Isabella Whitworth and Christina Chisholm, published in the winter 2011 issue of the U.K. Journal for Weavers, Spinners and Dyers. The article is available online as a free download from the journal:

http://www.thejournalforwsd.org.uk/application/workfiles/resources/art240.pdf

In a recent blog post, Isabella (dye expert, textile artist, teacher, independent scholar and dye editor for the above journal) adds some very useful notes to the dye experiences reported in her 2011 article. Check these out on her blog at http://www.isabellawhitworth.com; see also some other suggestions for dye authors on my reference page here. The link to Isabella's article is also in her most recent post about Japanese indigo

All the instructions needed for your Japanese indigo vat are there. Please disregard the journal links I sent in the original version of this post (if you saved it) and see my “Stern Footnote To Self” at the end of this post.

Japanese indigo is not a native of North America or Europe and has a bit of a rep for being frost-tender. Despite my limited experience of it, I have found it a plant with a violent will to live and leave a legacy. It sets seed abundantly, though seed viability is limited, maybe not more than two years from harvest.

In the photo below, you see that at every node, the plant grows long roots. These two-and-a-half-foot-long stalks of indigo were in a bucket of water for three days after I had cut the plants for the dye pot, and then got too busy to make the dye. The indigo rooted overnight at each node under water and bloomed after a day.


I obtained the seeds some two years ago from another textile artist and dyer in Ottawa, Debra Percival; Debra is also an accomplished printmaker and devotee of non-toxic printmaking. Debra starts her seeds indoors, then pots the young plants up in planters on her small patio. She notes that after composting unused plants that have set seed by the fall, she often finds plantlets growing in the compost in late spring from overwintering seeds. Find Debra at http://www.landfillart.org/debrapercival

I planted my first batch of seed in a pot outside in May two years ago…and forgot all about it that year. We had begun the process of selling our former house and indigo vats were struck off the agenda….Come October, I found the pot, plants still cheerful, and brought it inside to more neglect on a cold floor near a window. Though the plants looked scraggy and tatty, some pink flowers boldly showed up and set seed by Christmas…and by late February, seedlings appeared, became plants and yet again went to seed in the pot – only to suffer neglect for another year! It was the seeds from this second batch that provided the plants for the vat of 2014. Here they are, blooming and setting seed even in a pot of water:


Most dye authors (but not all) that I consulted ( see my Reference page) advised cutting the stalks before the plants bloomed, since dye could not reliably be extracted if the plants were in flower. The time to harvest leaves for the vat? Just before the bloom time! But I saved a few long stalks from the scissors to keep for seeds next year. Perhaps unnecessarily: the plants I cut at two nodes above the soil are now over twelve, lush, leafy inches high and it is barely three weeks since I collected the first harvest. Mind you, the fish fertiliser we use helps plants produce more leaves…


But after cutting down all the plants quickly before they could bloom, I found myself with too much indigo to deal with in one session. All the leaves from one planter full of plants were therefore dried and stored for “later”, while the harvest from the second planter went into the pot. And Lord knows what amount will yet arrive from the the plants that are now regrowing…I think I may get two more harvests.

Here is the first batch of dried Japanese indigo stalks and leaves; not sure if the stalks give colour, though…

Leaves stripped from the stalks and laid out, fresh and green:


After a day drying in the hot sun, the blue pigment begins to appear. I stored the dried leaves in a tin.


The dried stalks become bundles of warp on the garden loom:

And now the vat.

For my first indigo dye experiment, I used a (well-scoured) yard or so of silk velvet that had been an eco print flop last year.

I used a thrift shop electric turkey roaster with a thermometer gauge that allowed me to set and hold the temperature of the water in the pot to well below a simmer. I filled the pot with leaves, covered them with ice cold water and left them to warm for several hours, until the temperature reached 160F/60C. ( Slow warming ensures that the blue pigment is not destroyed.) The pot of leaves by then had changed colour to look like sherry:


After straining out the leaves, I added washing soda (sodium carbonate/soda ash) to the liquid, one tablespoon (15ml) at a time, until the liquid turned a kind of slimey green. Then I beat the water like mad with a whisk until It got frothy:


When I had plenty of froth (more than in the pic above), I heated the liquid in the vat back up to 160 C, then dissolved a tablesoon (15 ml) of thiourea dioxide in the liquid in order to remove the oxygen from the vat. I think I added a bit more than that, for good measure. This turned the liquid greeny-yellow. After a few minutes, I entered some silk velvet into the pot and left it submerged for about three minutes.

In the picture, you can see the silk beginning to turn aqua blue as areas of the fibre become exposed to the oxygen in the air.


Exposed to the air, the yellow turned aqua-green-blue.

Voila! I obtained this shade of green-blue by dipping the silk textile three times in the vat, each time for about three minutes, and hanging it for about five minutes each time. The textile had been eco printed once before but not very successfully, hence the yellowy-brown blotches on the surface.


The next step was to see if the indigo textile would accept fresh eco prints from plants with the pigment concentration that is available at this stage in the season. I layered the silk with aronia berries, Japanese maple, Cotinus obovatus and a few tansy buttons:

TBD!

And finally, a Stern Foot(In Mouth)note to Self:

The only things in life that one can say one truly owns are one's mistakes.

Dear readers, please note the mea culpa: This blog post is an update of the one from the early hours of Labour Day in Canada in which I made three bad editing blunders with reference to the Journal for Weavers, Spinners and Dyers.

I offer my apologies to Isabella and the Journal. Please destroy my most recent post about indigo if you saved it and note the following:

1. I gave the link to Isabella's article about dyeing with indigo (see first para, above) without checking that the site listing “free” pdf's had, in fact, received permission to reprint the article from the Journal for Weavers, Spinners and Dyers. I did not check (ouch) to see whether this site had permission to offer the JWSD article for download. I will not give the name of the site because they do not deserve any more publicity. I am truly repentant for my carelessness here.

2. Isabella's link is as follows: http://www.isabellawhitworth.com

3. Isabella is still the dye editor of the journal, not recently retired, as I, in my fog of indiscreet errors, stated.

And as one last note: I had also linked Isabella's name to the Midsomer Murders series…thank God it is no longer midsummer….