I stART the year..

…by looking back! Small wonder the god Janus is conceived as two-faced: with one face that looks back, the other that looks forward. So to look forward, I start from the experience of my 2013 Pilgrimage of Life In Art.

My pinched nerve and rotator cuff injury in early December 2013 has forced quite a few changes of plan, art-wise, for the early winter of 2014. So without 2014 work to show you just yet, for the next while I will present some images and info about my pre-2014 work, some of which has not so far made it to these pages, plus the work of some other fave artists.

My other intention, looking forward, is to update other pages on this blog, especially the info about native dye plants and links to other artists who work with bioregional plants for contact printing, wherever they might live in the world. That will indicate to you the focus of my art direction in 2014! I am looking forward to planning a new native/bioregional/pioneer plant dye garden in my new abode this summer.

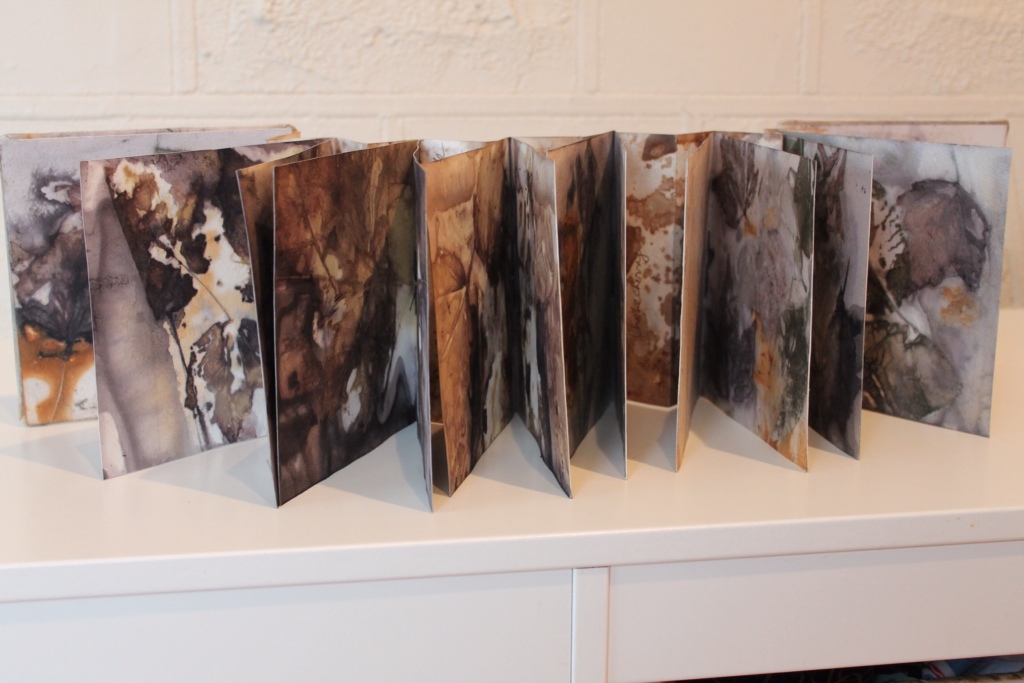
Meantime, may I show you some pics of some of my 2013 Artist Books in their clamshell cases, the latter made by my husband, Shlomo? We are both members of the Canadian Book Binders and Book Artists Guild. Our chapter, the Ottawa Valley, has an exhibit of members' Artist Books at the University of Ottawa Morriset Library for a month, starting January 13. The photos of the books were taken in last summer:

Rust and maple prints:

Now this is not an Artist Book, nor do I have his permission to show the work since the unnamed artist died several centuries ago. But the image shows inspiration for my Italian eco prints and eco dyes: Umbrian frescos, decayed over time.

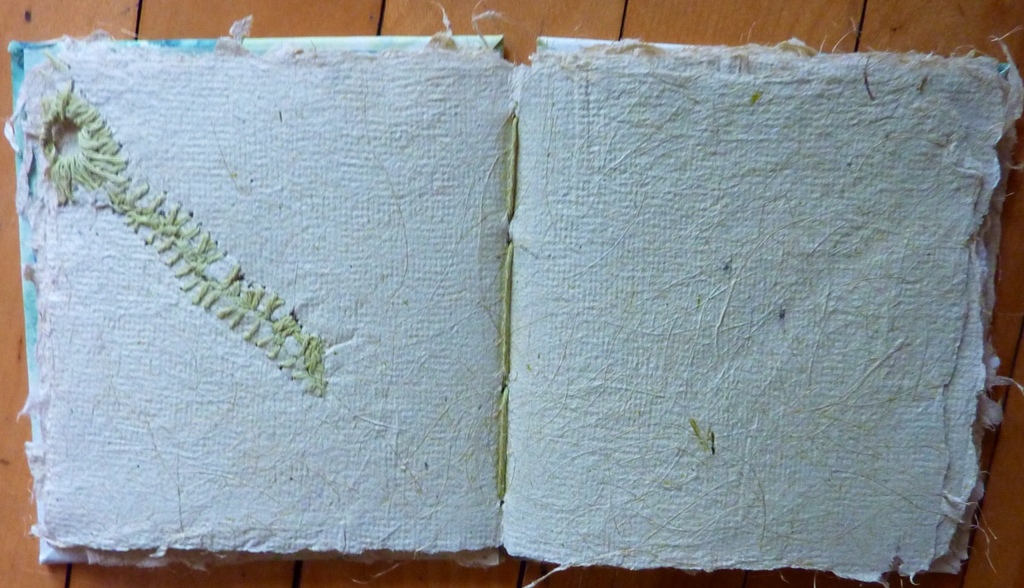
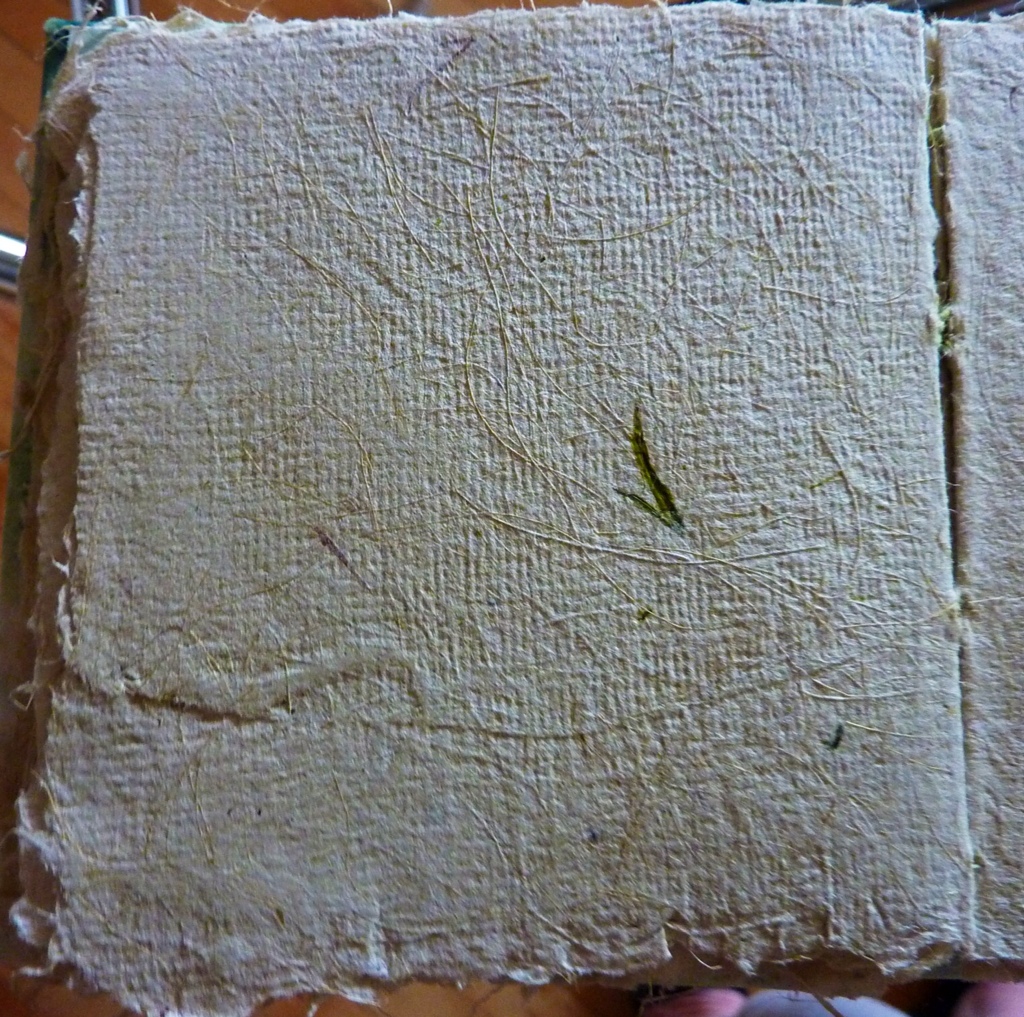
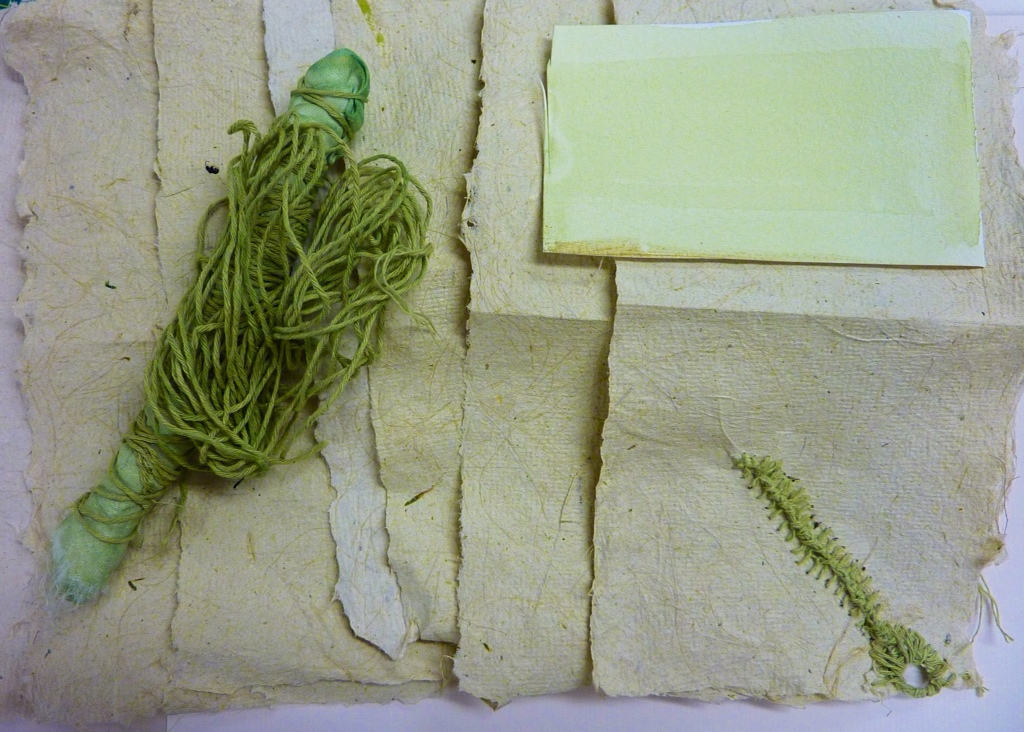
Below is a collection of contact prints on paper and textiles made with blue iris, part of my summer 2013 project to discover the pigment potential in blue iris blooms and the handmade paper potential of iris leaves. These works were exhibited at Portage du Fort, Quebec, as exemplars of Renaissance artist pigments and part of the Samuel de Champlain explorer festival. The display at Portage du Fort was later set up at the Ottawa School of Art. The photo shows a printed silk panel, several iris prints on paper and Artist Books of various structures including pages made with iris leaf paper, printed with iris pigment and iris ink. Clamshell case by Shlomo, papers by Wendy:

,

My artist residency work in Assisi:

More of my paper and textile fresco work, this time at the public gallery of the City of Assisi in the historic Piazza Commune. The photo shows a group exhibit of work by artists in residence 2013 at Arte Studio Ginestrelle, Assisi, Umbria:

One of my Artist Books shown at the University of Ottawa this month:

And the next series of beautiful glass mosaics was made by my daughter, Sarah, using a box of leftover glass fragments given to her by Shlomo. She took a pair of glass doors in her house and fitted the panes with glass mosaic:

Here is a work by another of my fave artists, my grandson, Dylan, now aged 4.

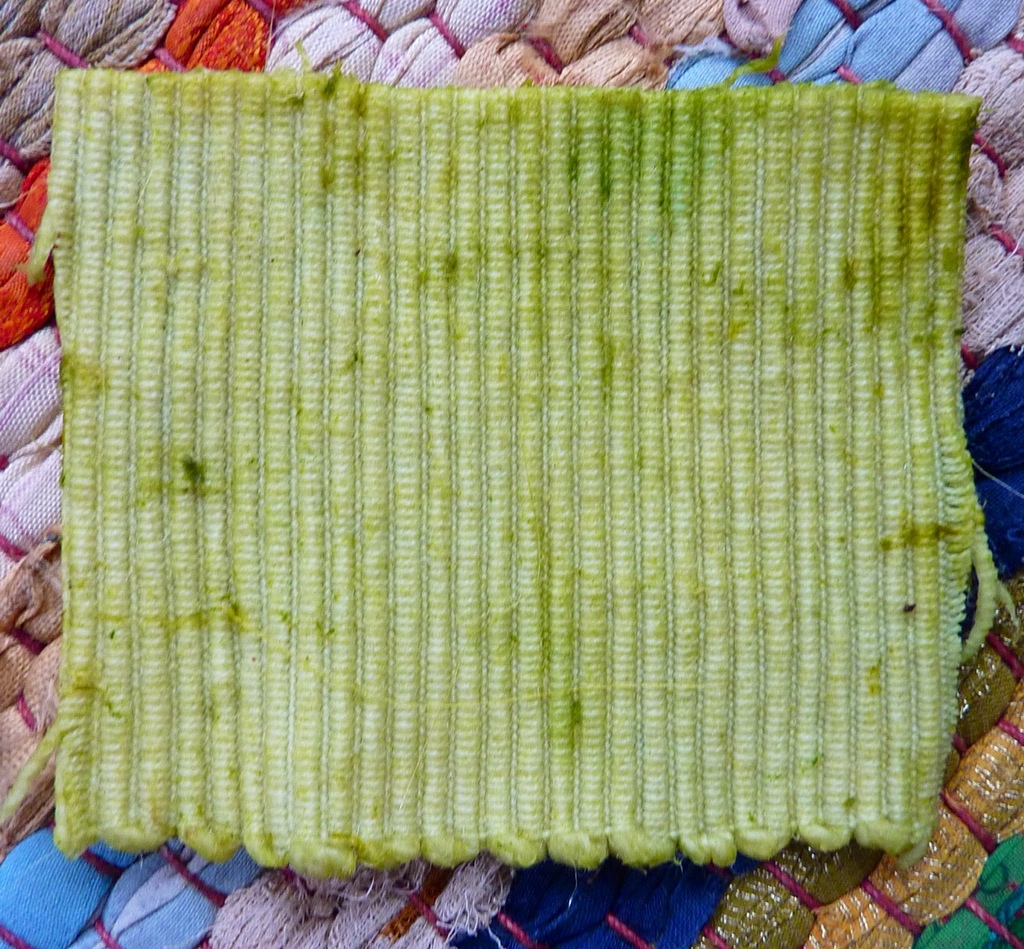
And a final work by an unknown artist's hand, found at the flea market in Gubbio where Saint Francis tamed the wolf: showing Assisi work, though in a less popular colour, pink. Note the beautiful damask linen weave typical of linen handtowels in that region. It is wonderful to think that once, time spent on work like this was considered time well spent:

Until the next Look Forward!

Happy new year to all my readers and a special thank you to all who have subscribed as followers.

Wendy


Iris Scrolls: Artist Books printed with iris pigments

My “Iris Camino” continues.

Today on my Iris Journey, I introduce two companions: Artist Books, printed with iris dyes and one of them made with pages of iris leaf fibre. (For pics of the Tall Bearded Iris, check iris eco print tags).


“Iris Scroll 1”, the first book is (re)made from thrifted and repurposed blank journal pages, paper type unknown but perhaps some kind of hand-made mulberry paper (The waffle weave typical of J cloth-type cloths used for drying papers is obvious on the journal page surfaces).


The book pages were singles so a “Flag Book” binding came to mind. And since a pun is involved (“Flag Iris” is a kind of wild iris growing near water), I enjoyed the connection to my chosen book structure.


Below is how the pages looked after being inserted into an accordion-type spine made of another found paper, no idea what kind of paper but it was too soft and fabric-like and a b**** to work with here.


I made a separate hard cover to house the Flag Book; the spine on the hard cover is made of my iris leaf fibre paper:


The single pages fly like flags:


The dye prints on the book pages ( “Flags”) were obtained from the bounty of the early June garden: Iris (blues, purples, turquoises and greens); Rhus typhina (sumac leaves: greeny-yellows and khaki-type browns); Coreopsis verticillata (reds, oranges) and spent Tagetes blooms (greens and browns from the calices; yellowy-orange from petals). The cover image is of a sumac leaf touched by iris and coreopsis; the spine is made of iris leaf paper, in two layers:


For the book spine (iris fibre paper) I used the thicker sheets, and coloured the inner spine paper with green iris ink:


Three overlapping “Flags”:


“The Medium Is The Message” (Marshall MacLuhan) in this next book.


” Iris Scroll 2″ has a coptic binding structure with covers and endpapers made from iris-printed watercolour paper, pages made of iris leaf fibre and sewing string dyed green with iris ink:


Oy. The iris paper is extremely fragile even after having added newsprint pulp (will use abaca or kozo next time) so the stitching turned out to be true “Stitch and Bitch” sessions…But still fun, ha ha, as bitchin' can be…
 
 
To sew, I used cheap cotton string dyed in iris ink, even though that string was really too thick for delicate stitching…The page papers ripped when I put in the needle and string, the pages failing to match up perfectly with the cover holes. I went back and reinforced the signatures with linen tape dyed in iris ink. That worked up to a point but did not hide the holes completely. Ironing the paper did the trick in closing most of the unwanted holes.
 
One must, at times, make a virtue out of necessity. I enjoy the “ghetto” effects of the rough papers, the very hairy deckled edges, holes everywhere all stitched up, the chunky pale green string…A study in contrasts with the elegant Iris prints in a range of blues and greens on the covers. I enjoy the abstract impressions made by the iris blooms that allude to original forms without replicating them.


” Surface Textural Interest” – AKA, Curator Art Speak for little fragments of unblended iris leaf as well as mends in the paper attempted with pulp when the page ripped during my sloppy couching:


More “textural interest”: AKA, blobs of white newsprint that I did not blend well with the iris leaf

fibre:


Wonky alignment of holes due to ripped paper in the signature folds:


Overall, though, I love the imperfections.


Next post: Renaissance pigments and the class with Genevieve Samson, book conservator and Renaissance pigment expert at Library and Archives Canada in the nation's capital, Ottawa

O, it was lovely! And perfect.


Iris leaves as a source of paper and pigment

First, some pics of my Artist Book “Botanica: New World Scroll” referred to in my previouscpost. The tutorial I published here some minutes ago gives instructions for making a book like this. The July issue of Somerset Studio magazine has published my article on how to make this book. That is great! But Because of some editorial errors and wishing to correct the info for readers, I have published my unedited article here for readers' benefit – as well as to relieve my own anxiety. See previous post!

This book will be in the show of work by the Canadian Book Artists and Bookbinders Guild held in Calgary later in July at the University of Calgary. And speaking of Calgary prayers and hugs go to my blog buddy arlee barr of Calgary who lost so much especially her studio.

Now a return to the Iris Adventure, El Camino de Las Irises ( forgive the rusty Spanish).

Guessing that blooms were not the only source of colour in iris, I decided to cook up some iris leaves to see if I could obtain both paper and pigment.


In water to cover and a cup of soda ash, the cut-up iris leaves (post-bloom period) were soaked overnight, then simmered at 180 for three hours in a large granite canning vessel.

Into pot also went a few lengths of alum-mordanted habotai, a bit of cotton, some vintage linen. Plants and fabric were simmered an hour together and left overnight.


The familiar soft iris green developed on the fabric in the pot but turned a neutral “greenge” when dry. Time to get out the dye assistants. Copper sulphate (home made, vinegar on copper pipe) can shift colours towards greens. Indeed it did, but much more strongly on silk (R) than on linen (L).


Iris leaf sludge made this ribbed cotton quite green. The sludge is a kind of green paste that settled in the bottom of the dye pot and that I collected after draining the pot:
 
After dyeing the fabric in the pot with iris leaves, I set about making paper from the leaf fibres. I was pretty sure by then that any paper made from iris leaves would be green.
I have made paper in a class situation before but never from my own garden plants. My aim was to produce handmade iris leaf paper to use in an Artist Book about irises and pigments.
Here is the first sheet, handpulled and a soft green (but not such good colour in the photo). Husband made me a mold and deckle from scrap wood and window screen fabric, 4″ x 8″, a good size for pages in a small book. I followed the usual papermaking steps: cooking the plants, straining them, rinsing the fibres well, squeezing out as much water as possible, separating the fibres into wee bundles, processing handfuls of plant fibres in a blender, mixing the iris fibre with newsprint (unprinted) pulp in the vat, pulling the pulp up on the mold to make a sheet, couching the sheets in a stack, pressing and drying the sheets.


I made 17 – 4″ x 8″ sheets from my pot of iris leaves, some thicker than others. The thicker, the greener.

The thinner, the more easily frayed or fragmented and in need of some fun stitching. (Repairs to medieval vellum MSS were often done with lovely embroidery. Very entertaining to the eye)

The thread I used for reparing the breach in the paper was cheap cotton string, solar dyed in green iris ink made from blue blooms. Waxing with beeswax made the cheapo cotton very much easier to work with. I was trying to work with comes to hand, like cheap string.

Don't forget that you can see a close up by clicking on the photo- you can even entertain your Inner Stitch Police Persona by checking my hand sewing…Note the various greens possible, depending on the material dyed:

Below, you see the different textures imprinted on the papers as they dried on J Cloths and Shop Towels; plus you can see the long iris fibres. Some of the papers have bits of green leaf embedded. Poor colour reproduction here, though – they hardly look green at all! They sorta look like home made crackers.

I do enjoy the deckled edges!

Next time: The Iris Book: with iris flower eco prints and iris leaf papers. This turned out to be serious Eye Candy for me!

After July 6, reports on soil pigments plus comments on my class on Renaissance pigments and using the iris “clothlet” as a source of green pigment for painting.

NB I am still looking for confirmation on the correct name for the iris variety that produced iris green for Renaissance painters and before them, Medieval MSS artists. I have out out requests…

Meantime, a few pics of fun things from my June garden, before June departs:

Perennial Geranium eco print on watercolour paper, dipped in iron liquor:

Ditto, a sumac leaf print:

Used iris blooms composted on watercolour paper:

Coreopsis, iris blue, iris green solar- dyed string:


Happy Canada Day July 1 and Happy Fourth Of July this week to all!


Wendy