November Studio

It is the last day of November and the day of Saint Andrew, patron of Scotland ( Greece, too) and all Scots, even those like me from Orkney! Time to report on the month's art activities, though I will not be done writing before midnight Ottawa time; still, somewhere to the west of me it will still be Saint Andrew's Day.

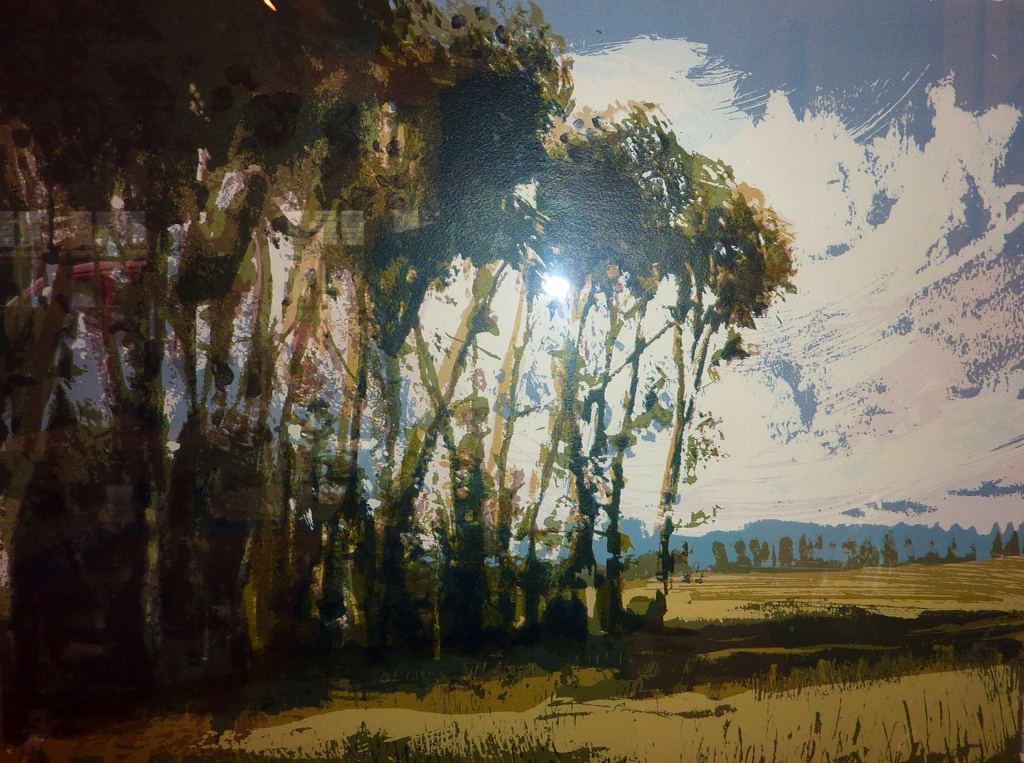
But first, a goodbye to the colours of autumn in The Kaleyard, last seen in the early weeks of a milder-than-expected eleventh month:

Sumac and amelanchier:

Potted amaranth and kale:

A late assortment of fall colours, some from October:

The last one is the perennial geranium, a sturdy plant, green under the snow and trusty provider of colour in the eco print pot.

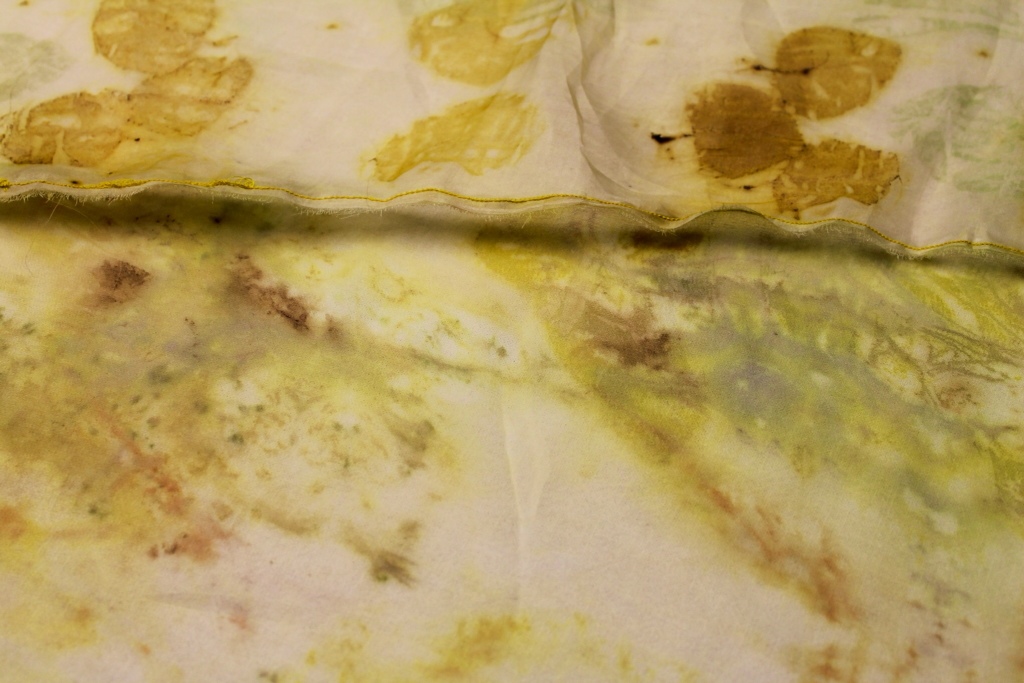
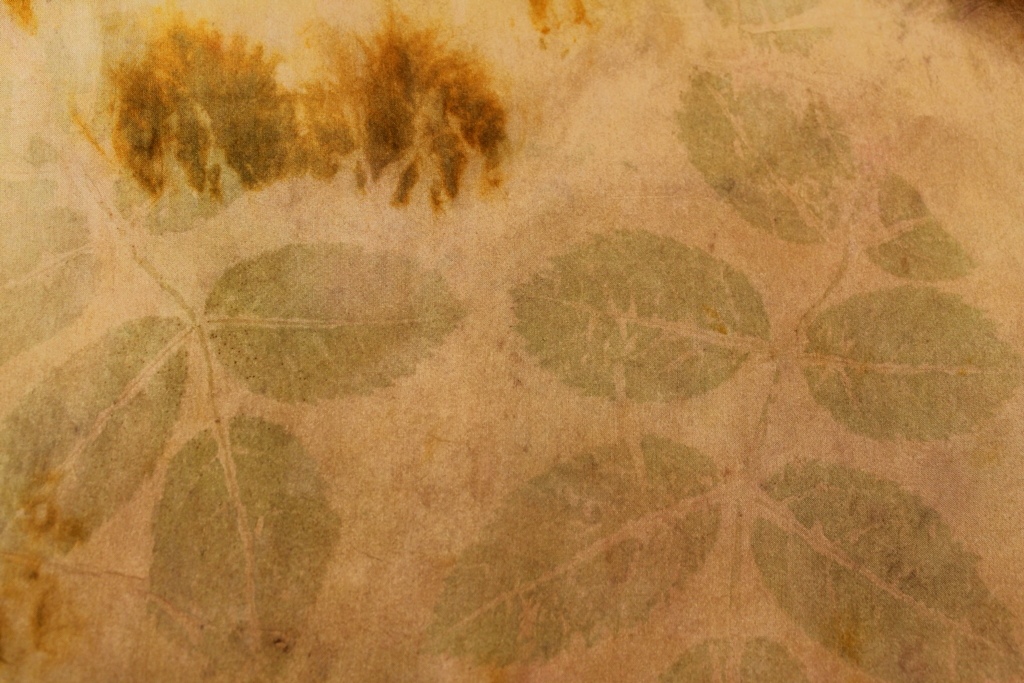
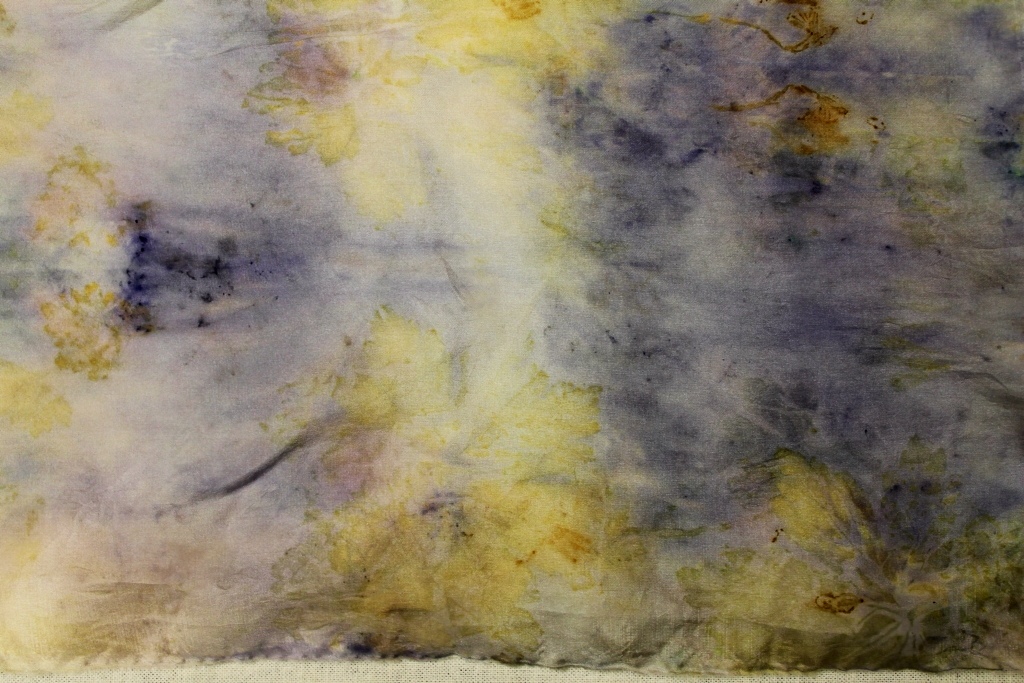
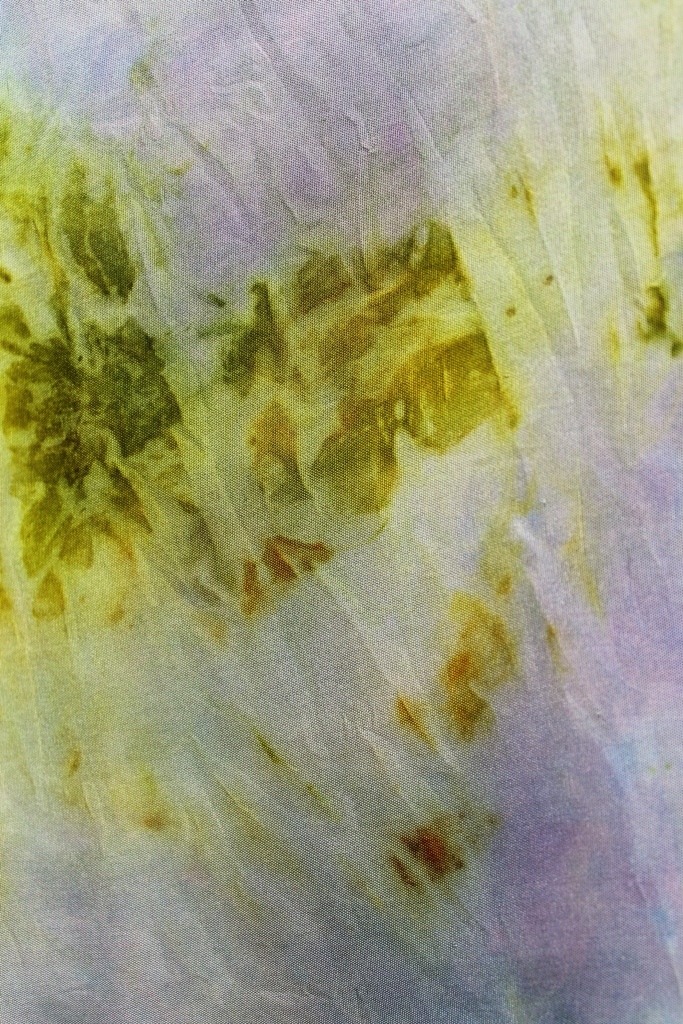
Here are some papers printed this month with geranium ( and cotinus)

A smaller geranium, greened by iron/rust in the dye pot:

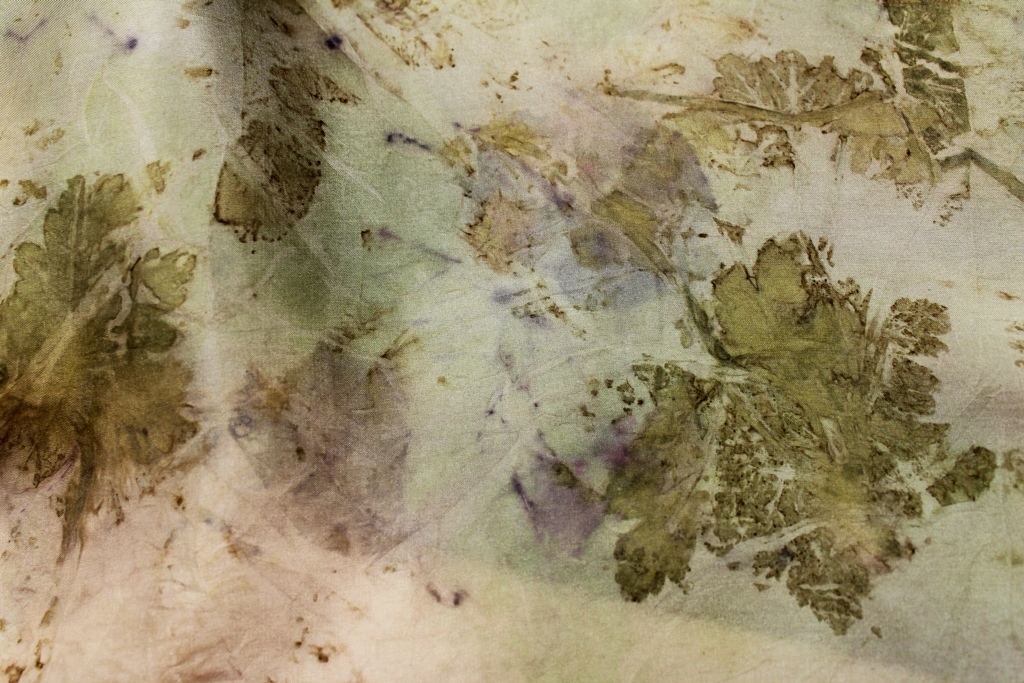
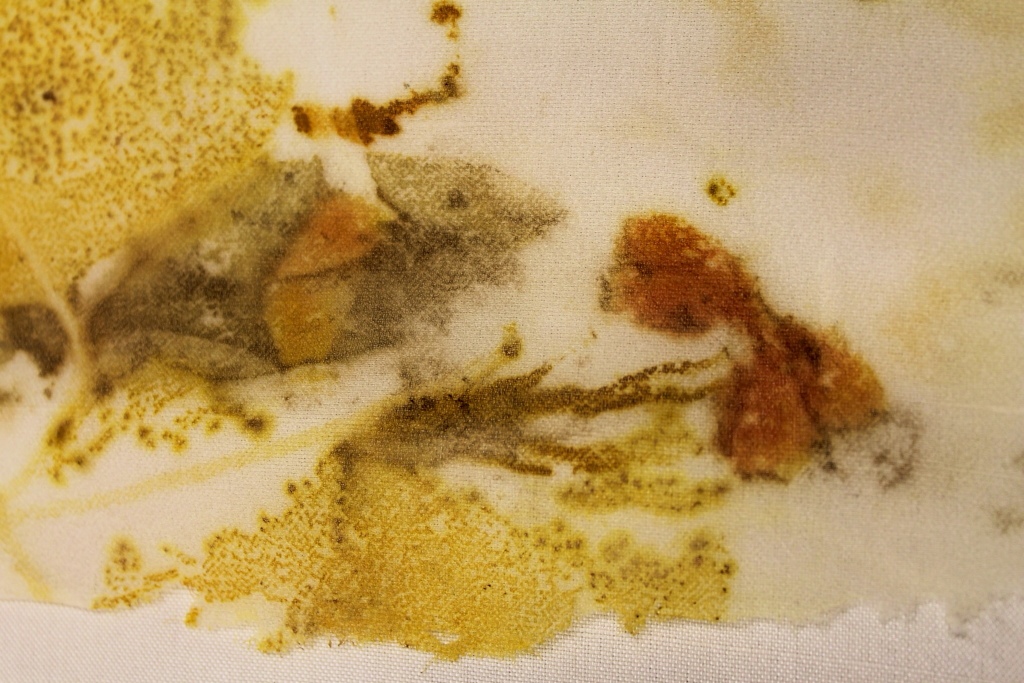
…and cotinus: the little flecks of pink are lovely and most likely to show up at this time of the seasons.

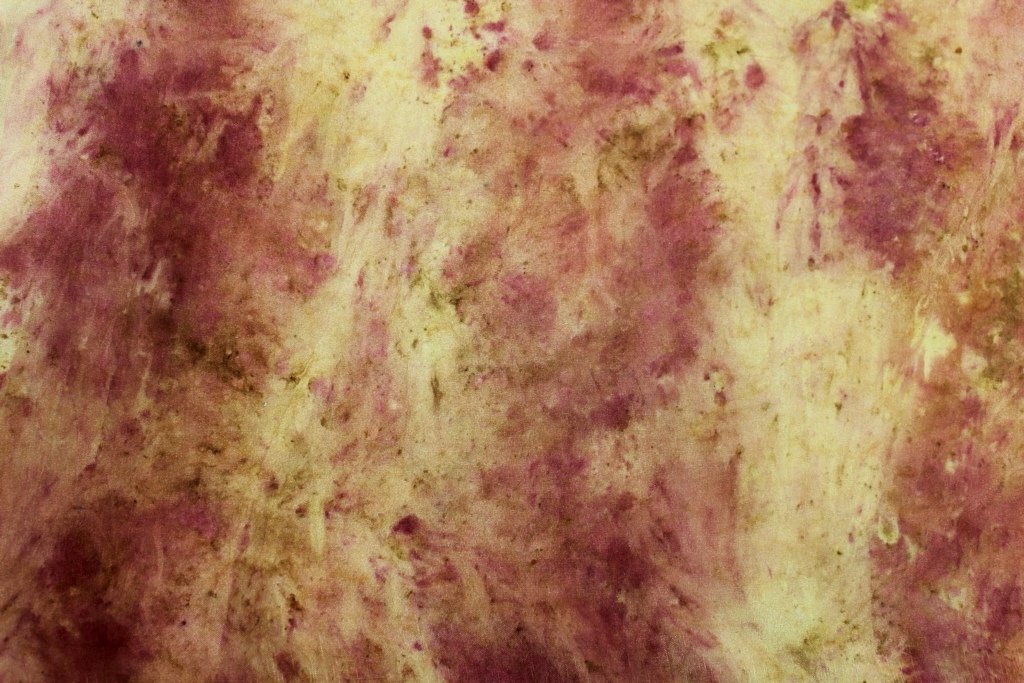
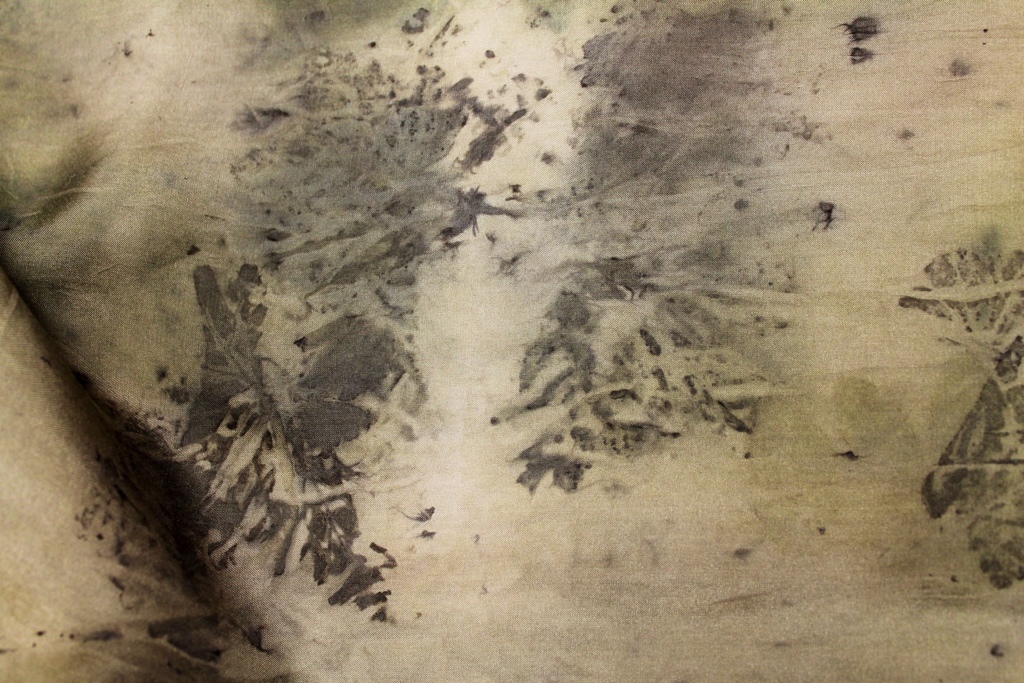
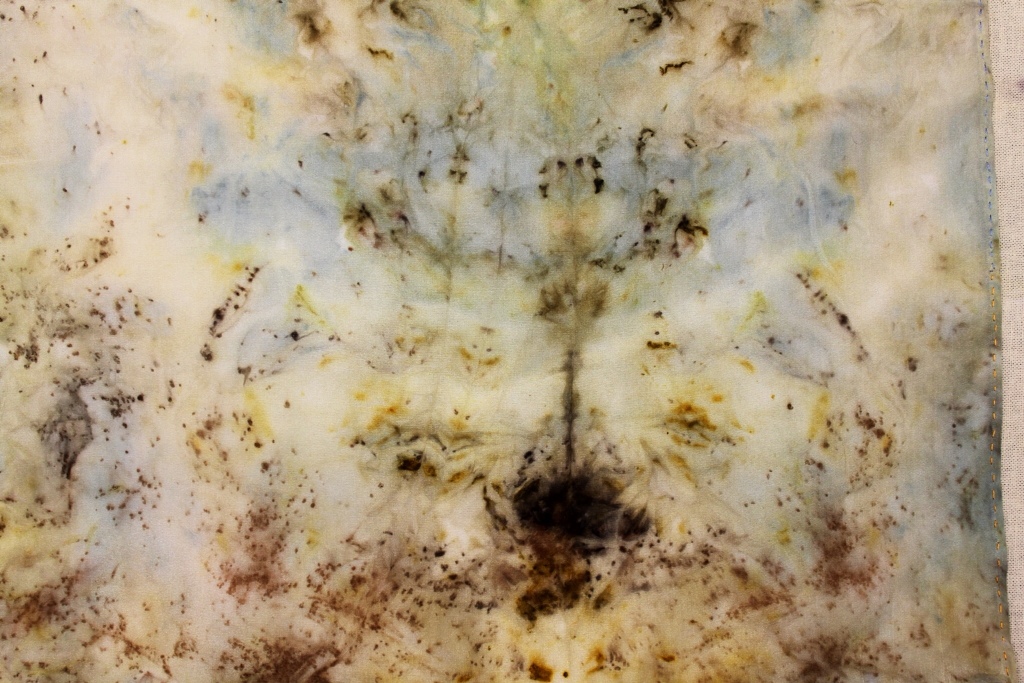
Cotinus: Charcoaled by iron/rust neighbours in the bundle:

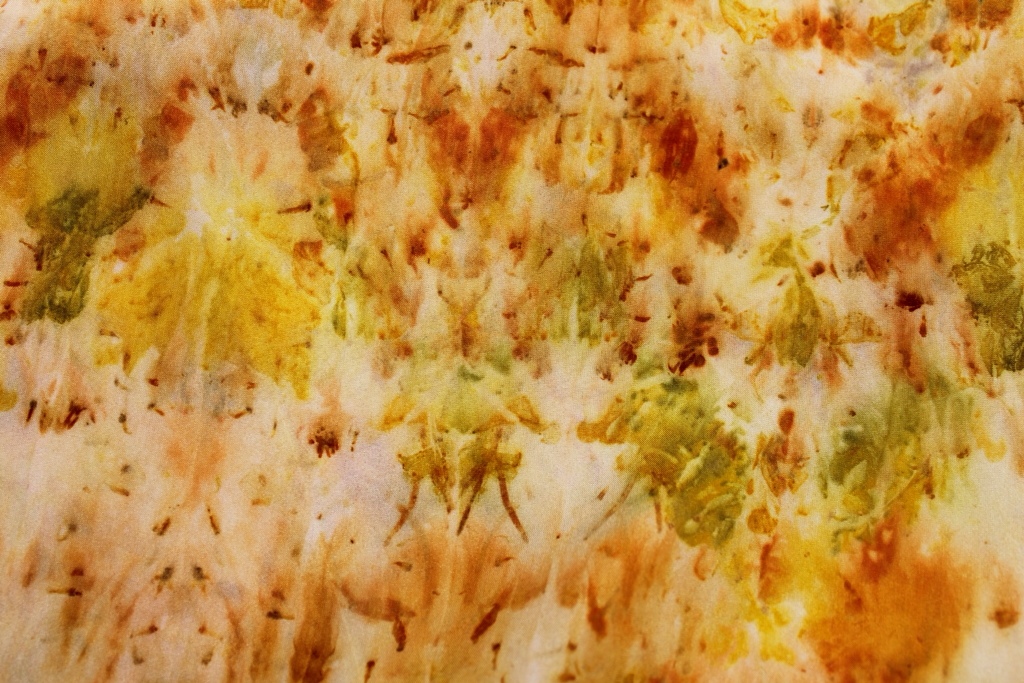
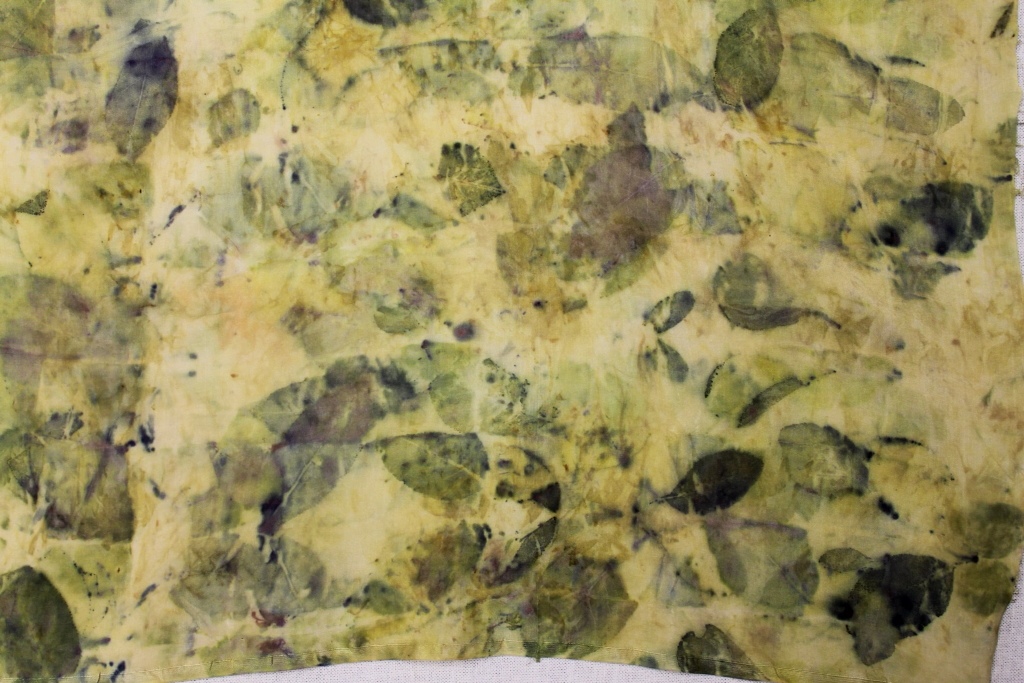
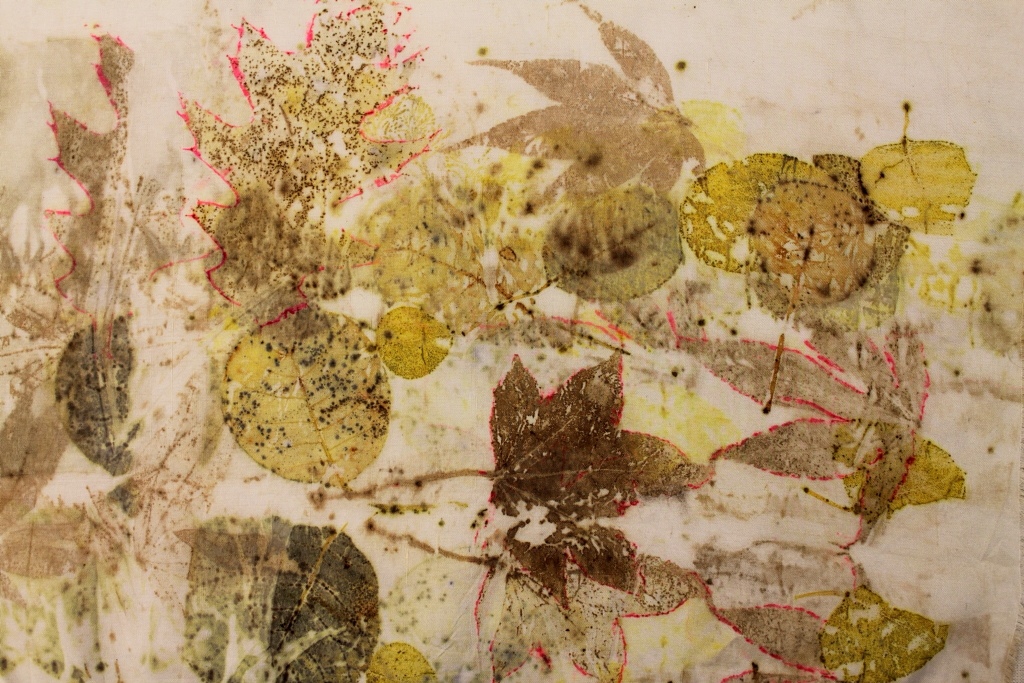
Geranium, two varieties, blackened and greened with iron/rust but still holding on to yellows:

As you might notice in the work of eco printers, yellow is a frequent colour. Some despair is possible.

But take heart, Dear Dyer. A solution is available from colour theory. ( As well as from some post- print tinkering- though not discussed here today – like touching up the colour with other dyes, paints or modifiers like iron liquor or copper liquor or ammonia. And no, post-print touching-up is not a ticketable offence according to me. You are the artist, and you get to do what you like with your art, especially in the establishing of your own purposes and the safe and rationale means of achieving them. )

Thus: To get the most of my yellows from season to season ( when they change value and even hue) I like to pair them with some strongly contrasting colours that can act as foils. In these prints, the contrasts come via rusty prints and cotinus; both leaves are tannin- rich that give deep charcoal or black in the environment of iron, and also some greens. Yellow and black are pretty powerful together.

And next, some more rust prints on paper, this time with indigo and tannins from tea: also powerful contrasts.


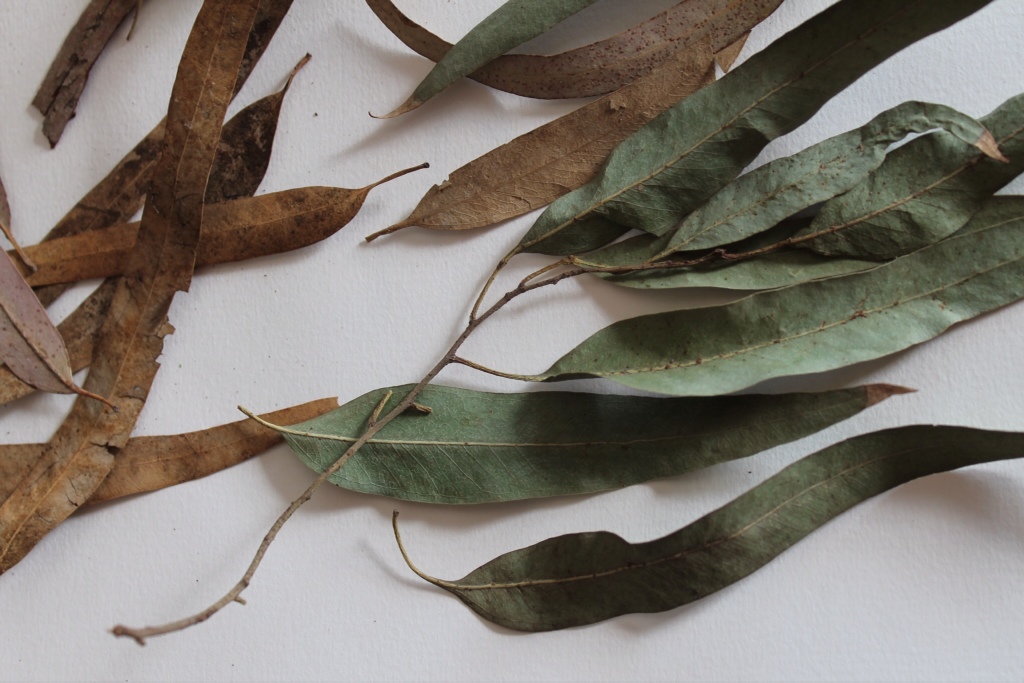
Winter wools are on my list of textiles for dyeing, and this year I am trying for that famous and popular ( but non-native hereabouts) eye-popping eucalyptus red introduced to us by our DownUnder Diva of Dyes, India Flint. I have a lot of dried euca around the studio saved from supermarket bouquets and welcome those Green Immigrants to the dye plant stash. Bundled with Prunus virginiana and immersed in a walnut dye bath ( Juglans nigra) prepared in a crockpot with the heat set to “low” and left overnight, some of my wool fragements look like this:

Don't the colours look familiar?

The prunus gave the teal greens and even purple, while the euca gave ranges of reds and orange with a tad of yellow. Of course, the walnuts give rich brown on wool ( though much paler on linen) So here, we get the power of analagous colours in teams beside colour complements in the red and green.


My most recent project this month was with Dylan, my wee grandson, aged six. We have done lots of painting and stamping and so forth on big sheets of paper, using a very basic palette of cadmium yellow medium, cobalt blue and some kind of red (we lost control of the inventory – most likely the red was cad. red) plus a nice metallic gold. Those paintings mount up – kids are decisive and prolific painters and do not hang about obsessing over the next brushstroke as we adults might tend to do. i heartily recommend a session with a six year old to get you out of your Art Rut. Just try keep up with that kid! But what to do with all our paintings as they piled up?

I hit on a plan to keep the works but to make them easier to store and fun, too. We will make books and boxes, said I!

So we have been making books and boxes from each single sheet painting, working with origami-type folds and no glue. This is an ongoing project, so today I am sharing just a few. The first is a wee box made in the style of the compartments in the Chinese Thread And Needle Case that I completed earlier this year.

For this one, Dylan and I stamped the paper with wooden Oshiwa blocks ( also reported on my blog in the past) and carved Indian textile blocks:

Others we made from painted papers:


And a larger box from some of my above-described geranium-cotinus prints:


If you want to try these boxes yourself, keep the ratio of the paper three times the size of the finished box; thus, the 'Geranium' box started with an 18″ square piece of paper and folded down to six inches and a tad as a box.

Here are some pics of a box under construction, to refresh your memory for the folding sequences: as you can see, you need to fold the large square of paper into a nice grid. The centred square (fold) is the bottom of the box when all the folds are in place. Two boxes fit on top of each other to make one box with a lid.


Next time, some more art from the studio with my young apprentice, who, bye the bye, was able to anticipate the next fold in his box as we went along…so you can do it, too! And it's a good time of the year to make gift boxes!

i shall likely post again about the art- from-grandkids' paintings sooner than I might otherwise do – I am grounded this week after a wee bit of surgery to my foot! But the mind keeps travelling, Dear Reader…and the hands can still move.

The blessings of Saint Andrew's Day on ya'all!


Wendy


September Goodbyes

Not goodbye to my blog this September but certainly goodbye to the studio and garden at 20W. The Blue Heron came to say farewell:


Spent all of August and September so far sorting, packing, recycling, chucking out:


Of course, I saved a stack or two of this summer's printed textiles for blog pics. July was basically my last month working in the studio, racing to finish eco printing wools for an article in the British “Journal for Weavers, Spinners and Dyers” (www.thejournalforwsd.org.uk); making sure to use up all the iris leaves in my garden to make paper and the frozen irisvblooms to print book pages and cloth; finally, printing up silk that had been soaking for weeks in alum water.

First, the wool ( a recap of last blog post):


Wools eco printed with iron, maples, sumac, coreopsis and prunus cistena. Now for the silks:


Prunus cistena and coreopsis, above.


Rose, marigold, iron, sumac, prunus c.:


Coreopsis verticillata, rhus typhina, “Purple Passion” apple slices:


Rugosa rose, prunus cistena, iron, sumac:


Tagetes, iron, prunus:


Rhus typhina, Coreopsis v., Rosa rugosa:


Tagetes, Prunus cistena, Eucalyptus globulus:


As above, with “Purple Passion” apple slices.


The Story Table.

Witness to the spinning and weaving of many life-tales ( and plenty of unravelling, too) this (five-dollar) school library table was rescued and gifted to us 40 years ago…Oh, it has seen and heard many a story…For the new house, it will get a face lift but it will always remain our communion table:


Here we all are, as we are on Labour Day 2013, saying goodbye after a final meal as a family in our home of 35 years and celebrating our 40th wedding anniversary.

Clockwise from the tallest: Shlomo, Shannon, Sarah, Scott, Hannah, Matthew and Wendy. Seated ( L to R) : Nemo the Lab, Dylan, Noah, Layla.


Next up? Making art in Umbria, Italy!

Off to spend the month of October experimenting with the dye properties of plants in Umbria along with bookbinding traditions there as well as papermaking…Will be posting from Mount Subasio near Assisi.

Arrividerci!


Eco Print Fest!

Today's post shows more experimental prints made by students during the recent IMPRESS '13 International Print Festival. But first, a few thoughts in which to situate the sharing we can choose to aspire to as art bloggers. In the Foreword to the festival catalogue, internationally esteemed British painter /printmaker Hughie O'Donaghue remarks (with admirable humility, I would say, for this guy is a Big Wheel in art):

The fine art print is constantly changing and developing and it is a medium that is advanced by dialogue and exchange. Unlike painting, which is very much a solitary activity, printmaking often takes place in a social environment where artists gather together to share equipment and facilities and, as a result, inevitably exchange ideas. This dialogue is something I have prized in the various print studios that I have worked in over the years in Italy, Ireland and Great Britain.”

Here is some more work by other accomplished printmakers who participated in the festival and who also became students of eco printing:

An oak leaf: rust and logwood powder over …something yellow (no label…)

Eucalyptus (L) with iron modifier producing black outlines. Source of the blue? Could be juniper berries or bits of Red Cabbage.

Rectangular cuts of metal rusted with vinegar, printed on silk tissue, with Red Cabbage

Brushing on some of the dye modifiers, postprinting. Note the conscientious labelling!

Carrot tops (yellow-green) and logwood with a tad of Red Cabbage (blue), with colour mixing

Red Cabbage and kale

Metal pieces, rusted with vinegar, with dye powders on accordion folded watercolour paper. Much colour mixing, especially in the folds of the paper.

Sage and eucalyptus (L) modified with iron (R). Note the well-filled notebook (L)

Adventurous collection including juniper, Cow Parsley, nettles – modified with iron liquor (L) using a fan brush – giving the effect of raking light.

Sumac (pink), nettles, R.Cabbage et al, i.e., colour mixing taking place.

Turneresque euca with iron. Pigments leaked through from the prints on the back of the paper.

Lovely. Nettles? The green, centre. Rose leaves (L). R. Cabbage and sumac berries (R)

Euca, R. Cabbage and madder powder

Just vinegar and metal pieces on silk tissue to give a rust print

Rusted metal with plants and string resist. The shiny patches that look white are rust

Beautiful wash of colours. By now, can you guess? Colour mixing here is wonderful.

Another view of one shown in the previous post. Sumac and berries- juniper? mistletoe? Acorn cap?

On silk organza ( for chine colle) – ??? plants with string resist.

Crocus blue, mint yellow green, sumac pink

A repeat from last post – I remembered that this was a rose petal and not a rose leaf modified by iron to give dark shades

Here are some prints drying on the rack. Great to work in a real print studio!

While we were in the studio eco printing, Andy Lovell http://www.andylovell.com of the Gloucestershire Printmakers Collective and a participant in the festival was screenprinting up a storm on an adjacent bench. Here is one of his wonderful screen prints:

Not sure of the title. Would like to call it “Mine” . It calls to my mind the landscape of the Cotswolds, anyway.

..as does this landscape by Constable (seen in the Tate Britain)

…and this, my own photo of the Cotswolds looking over to Wales. Talk about “green pastures”…sigh….

More about the artists in the festival next time – including Damien Hirst! Subject of many debates, as is only proper for art…

And bearing in mind Damien's “dot” paintings – here, to finish, is how my grandson, Dylan, appropriates dots as an art medium:

Why stop at Red Dots?

And why stop at the hand as canvas? And why not include stars?

Best

Wendy


Eco printed socks: Sweat as mordant?

One pair of Husband's 100% wool cross-country ski socks, forty years olds…yes, forty. (I am not the only one with a Stash…)

One day in the winter with only left-over dried eucalyptus to print with:

Wool socks bundled over debarked wood and simmered in left-over dye bath (dried coreopsis, tagetes and euc leaves) for a couple of hours:

The results with Eucalyptus globulus: One side of the bundle:

Other side:

Note the heel area and the colour obtained there:

Red on the upper sock where it came in contact with the heel in the rolled bundle:


So now, will Husband wear these? The answer is YES, he will. They look like the skin of some exotic animal!

But will I let him? If NO, only because I have other ideas than feet-covers for the fate these lovelies

Eco prints for wedding guests

Just a few days to go before the wedding …Chuppah Day is May 6!

The Bride is making up little Loot Bags to greet the wedding guests, with fun contributions from sundry friends and family.

For the cause, I am donating my stock of stitched and eco printed greeting cards…about six dozen. This is still the year of stash busting! The cards were fun to make, especially with eco printed watercolour paper, cut to fit a greeting card window. The stitched cards have always been a favourite way to limber up in the studio…no planned designs, just playing with colours and textures using fragments left from finished works to make tiny artwork – see a selection below:

The eco prints below were made Fall 2011:

Th


Fig leaf print

Before leaving for NYC, I had to cut back my indoor fig:


What to do with the fig cuttings? Why, layer them over silk velvet and silk noil them with fermenting (three months) eucalyptus:

On silk velvet:


On silk noil:


The euc gives up its colour right away:

The two were bundled, wrapped in plastic and left outside in a wee portablevgreenhouse to solar dye until I get back. We will see if steaming or immersion dyeing will be needed to develop the colours.

Until next time

Wendy

Assembling the Chuppah: Almost Done

“Chuppah” means “that which covers or floats above ” ( cf. The New Jewish Wedding, Anita Diamant)

Silk organza and silk chiffon float nicely but they are not so easy to sew. Boy, do they slip and slide and stretch… and float away from your fingers. I cast my mind back to Needlework class at High School in England and to Sister Mary Joseph, our Needlework teacher, and all my wonky lapped, French and Run – and – Fell seams. Sigh. Indeed lovely. But time consuming. Could there be a less ” Slow Cloth” solution?

I tried a “short cut” to a faster cloth. What if I laid the textiles out on the wood floor, stuck it down with low tack tape and used the straight joints between the wood boards to true the fabric and to align the seams?


Not every “What If” works. All I got from this one was more wonky seams, just as in Needlework class. Several hours, some Avoidance Activity ( will report later on this) and much really picky seam unpicking later..

I was ready to heed Sister Mary Joseph’s advice: “Tack them in place first! “

It took me quite some time to baste four 72″ lapped seams but this is Slow Cloth and it was worth it. I even enjoyed it. The eucalyptus print panels were lapped to the Red Cabbage print overhead canopy after seam edges were zigzagged to reduce fraying/ and straight stitched for easy folding; then the seams were machine stitched flat. (I think the US for Sister Mary Joseph’s term is to “flat fell” a seam)

Next was the applique of motifs on the canopy. I had some misfortunes with the lettering on the canopy roof. For the English verse “His /Her Banner Over Me Is Love” I used very old fusible and so the letters peeled off after a few days…another lesson learned. For the replacement letters, figleaf motifs, Hebrew letters, Mogen David and Olive Branch appliques, I switched to new Steam A Seam Light. It took a couple of extra days to re-do the lettering but the results were satisfying.

Lettering lower left.


An Olive Branch entwines the letters on the canopy:


Fig leaf motifs in five layers of silk organza for the four corners of the chuppah, strong enough to support the poles and the canopy:

With a soldering iron, I burned holes in the fig leaf motifs for the screws on the finials to pass through, then fused the fig leaf “patches” to the corners of the chuppah.

The finial in place. We found the poles and finial on sale in the drapery department at a local fabric store


This house plant provided the template for the figleaf. Can you see a fig?


Remember the recent Red Cabbage experiments? These lovely blues and turquoises are now part of the chuppah.


All of these printed textile fragments are to be incorporated into the final phase of the chuppah construction as long ribbons or fringes attached to the poles at the corners. The ribbons go in groups of eight on each of the four poles to signify fringes, as on a prayer shawl.

Here are some of the ribbons in progress. The Red Cabbage blues are combined with fragments of other eco printed textiles in co-ordinating colours. The yellow silk is Golden Rod, the dark one is tea and rust printed, the light is a eucalyptus print, the blues are Red Cabbge.


The edges of the chiffon and organza ribbons need restraint and a narrow zigzag does a pretty job of edging. For readers cringing at the very thought of how long it might take to zigzag around 32 ribbons, 72″ long:

SURSUM CORDA! Lift up your hearts!

It took me ten minutes to make one ribbon after cutting it out: so six minutes to sew one ribbon, two more minutes to iron it and another two minutes to trim off the “beards” with my trusty little Fiskars snips. Add five minutes as guesstimate for cutting, so fifteen minutes per ribbon times thirty- two.

Thus, four hours to make the ribbons ONCE the printing is done…and the amount of time for eco printing is another story…Slow Cloth indeed.


Finally, here is a pic of part of the chuppah in progress with lettering and leaf motifs in place. The blue of the sky today (it was a ridiculous 80 degrees F here in Ottawa!! ) and the blue of the silk roof of the canopy look almost the same. That was the idea- for the Bride and Groom to look above their heads, for the canopy to disappear almost against the sky and see only blessings on their wedding day.


Last pics of the chuppah before the wedding will be to show the ribbons all done and the 16 small “buntings” or “prayer flags” in place. After the wedding (first weekend of May) I will post pics of the finished textile.

Next post: Avoidance activity: eco printing with blue hyacinth

Yorkshire Leaves Make A Rainbow For The Chuppah

For the British family contribution to the chuppah, lovely Cousin Pam in Ilkley sent me these near-evergreen leaves from her March garden near the “tops” . I am not sure of all of their names but they include (I think) variegated holly, spotted laurel, saggitaria, bay, erica, rosemary and thyme. The red leaves are new growth.


The leaves were bundled in four panels of pre-mordanted silk chiffon and steamed as usual. I was hoping for spring yellows and greens, and was not disappointed! The looked-for surprises were the blues and purples from the red leaves and (I think) the heather (erica) stems. The heather bells gave some pinky browns and spots of dark green.


Here are some close-ups of the Ilkley panels (I have begun to sew the edges of all the printed panels to restrain the fraying a bit – not too much restraint, though. A narrow zig zag makes a pretty and informal finish.)


I have sewn two long panels together. See the pinks and greens on the bottom Ilkley panel


Purpley-browns and greens, on the left Ilkley panel.


Greens and blues, on the right.

Purples, blues and greens, bottom panel.


I layered the chiffon Ilkley panels beneath/over the previously printed eucalyptus on silk organza (reds, yellows, oranges). The colours from each layer interact and make a fascinating colour mix, a shifting rainbow palette. The euc orange mutes to warm peachy pink under the spring green layer.

These layers of eco printed chiffon and organza will form the four sides sides of the chuppah canopy, about 12″ hanging down from the “roof” all around.
I intend the sides of the chuppah to appear different, depending on whether they are viewed from outside the canopy or from inside. The chuppah will define a unique and sacred space for the Bride and Groom during the ceremony. After the ceremony, all are invited to enter and share the joyful spirit of the day.
Next time: Hmmm…can’t give away too much more before the wedding…

Eco printing the chuppah 5

My garden (the one the Bride grew up loving, but, er, not actually ever having worked in) has supplied all the plant materials (except Sweet Gum and Japanese Maple) for this collection of eco prints which were completed mostly last summer and fall. Some dried and frozen plant materials have been printed this winter. The USDA zone for an Ottawa garden is 4 while Canadian zone classification puts it at 5A, so taking garden micro-climates into account, one can make reasonable guesses about the range of dye plants comfortable here.

Sumac berries bundled in silk habotai


Rose leaves and tagetes marigold on lichen dyed vintage kimono silk fragment

Perennial geranium on silk habotai
Perennial geranium on silk habotai, modified by iron


Coreopsis verticillata (reds)and tagetes marigold calices and petals (greens and yellows) on silk habotai

Perennial geranium (yellow-greens), Golden Rod (yellows) and Red Cabbage (blues) on rusted silk habotai
Red Cabbage (blues) and tagetes marigold petals and calices (oranges and greens resp.) on silk habotai
Orange pekoe tea (blacks and browns), rooibos tea(rusts), safflower petals (yellows), Red Cabbage (blues) on silk habotai. All from the grocery store.
Purple Sandcherry and Purple Basil on silk broadcloth. Blues and greens.
Oak, Japanese Maple, Sweet Gum, Cotinus Coggygria (dark greens) and eucalyptus cinerea “Silver Dollar” (yellows) on silk broadcloth. No idea where that pink came from.


Note on the colours: I used a Canon Rebel SLR set at fully automatic, then the “enhance” in iPad photo edits. I find the colours very true to life.

Next time: If my new computer arrives this week, I can share some pics of the garden from last summer and fall. It is hidden under snow right now.

Eco printing the chuppah 4

More eucalyptus eco prints, maybe e. camaldulensis…?

On silk organza, lovely browns and dark greys from dry
leaves collected from the ground beneath the tree.
The fresh fig leaf printed bright green and the mature (long pointed) dried eucalyptus leaf gave browns.
For contrast, rusty orange reds from the juvenile dry Baby Blue eucalyptus, roundish shapes.


A mix of dried Silver Dollar eucalyptus (roundish juvenile leaves to give yellows) and dry mature eucalyptus (camuldulensis?, to give browns ) plus some greens -real greens!- from florist filler fern that came in a bouquet my husband brought me.

Below is just a close up look at a Seeded Eucalyptus print on a silk chiffon fragment that looks to me like a passage from an abstract painting. The red blobs are the seeds.

Here are organza panels bundled with eucalyptus, ready for steaming in the turkey roaster. It took about two hours for the red-orange colours to develop, though some stayed yellow.

Another eucalyptus abstract.
Last word to the Impressionist fave contrasts between orange-yellows and blues: Red Cabbage blues on the left, Silver Dollarv eucalyptus yellows and oranges, middle and right.


Next time: Eco prints for the chuppah from the Bride’s home garden