A Garden Printed in July

Eco dyeing and eco printing are, for me, art forms sprung from my lifelong love of plants and gardening. My earliest childhood memories, in fact, are of the textures, forms and colours of plants – bilberries, heather and fuschia growing in Orkney. Since then, I have made a garden in every place I have lived, starting small in England with seed packages of orange calendula, blue cornflowers and purple Virginian stock that my garden-loving parents gave me. In my current Ottawa garden, just two summers old, I am slowly building a collection of plants native to eastern Ontario or other parts of North America, but not so exclusive a collection as to banish well-beloved European green immigrants, sentimental favourites, that have adapted to our eco zone. I am also delving into the tradtional use of dye plants by First Nations of this area. Some of the latter plants (Sanguinaria canadensis /bloodroot, for example) had made themselves at home in my new garden years before we bought the house. Such are the plants that I want to use for eco dyes and prints – local, regional, national and a few well-travelled and well- behaved internationals. The epithet “eco” in eco dyeing can mean several things, of course, but first, I use it to refer to my use of plants that are native to my geographical area, especially those I can grow myself or forage with respect in the neighbourhood.

And now into the garden during a hot and humid month of July in Ottawa. What to find in bloom there, full of seasonal colour for printing? Below, a little bouquet of favourite flowers and leaves that work for printing: Clockwise from the left: Bee balm, Japanese maple, Coreopsis verticillata, rose leaf, blue cornflower, calendula, burgundy cornflower Anthemis tinctoria (Dyer's marguerite), Cotinus obovatus (smokebush).

Not only the oft-invoked serendipity and spontanaity but also some deliberation and discrimination went into planning this series of “July Gardenista” prints. Instead of going first for the “dark and stormy” eco print that is the result of putting iron and tannin- rich plants together in the bundle, my goal with this little collection was to pair complementary colours and to promote a range of analagous colours by a careful choice of pigment-bearing plants. I wanted clear, bright summer's day colours , a “painter's palette” .

And after first showing you the “painter's palette” prints I obtained on paper, I have included some of my “dark-and-stormies” : the iron-tannin-indigo prints that develop fast outside on the stones in the heat of a 35 C day!

Here are the ” painter's palette” results.

The plants below were printed on (thrifted) handmade paper, highly textured, most likely some kind of mulberry (kozo).

The cornflowers, calendulas and coreopsis above are still attached to the paper

Orange calendula print and bloom, above.

Blue cornflower print ( Renaissance artists considered this blue to be inferior – or so say some of the art historians like Daniel Thompson) I love that blue-orange opposition!


Cotinus in July – a new colour each month from this plant! Blue with green from cotinus

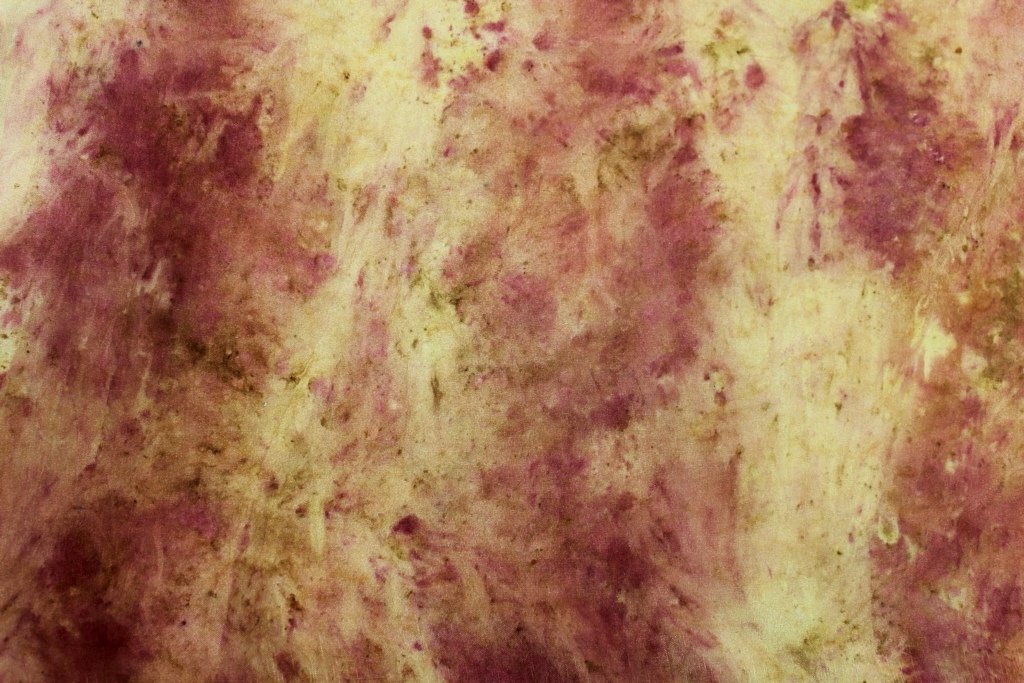
The pink-purple is Monarda didyma ” Cambridge Scarlet”/ bee balm

Coreopsis verticillata red with marigold yellow

A few pages together. The red stems of the coreopsis bring essential structure to the design on tne surface so covered with abstract smudges of colour

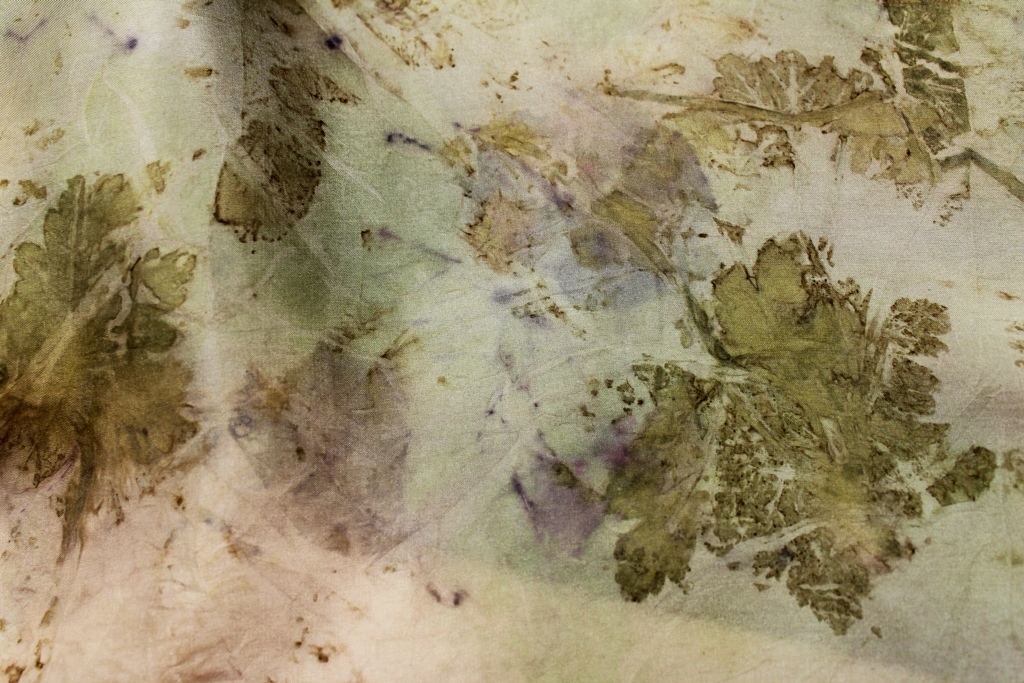
Blue pansy, fresh, prints teal-green: a strong shape in a strong colour. Then we have the yellow- purple complements via Anthemis tinctoria and Monarda didyma, amorphous stains

More red- green complements, with interesting strong red lines and loose smudges in contrast. Plus a bit of blue in there. Where did that come from?


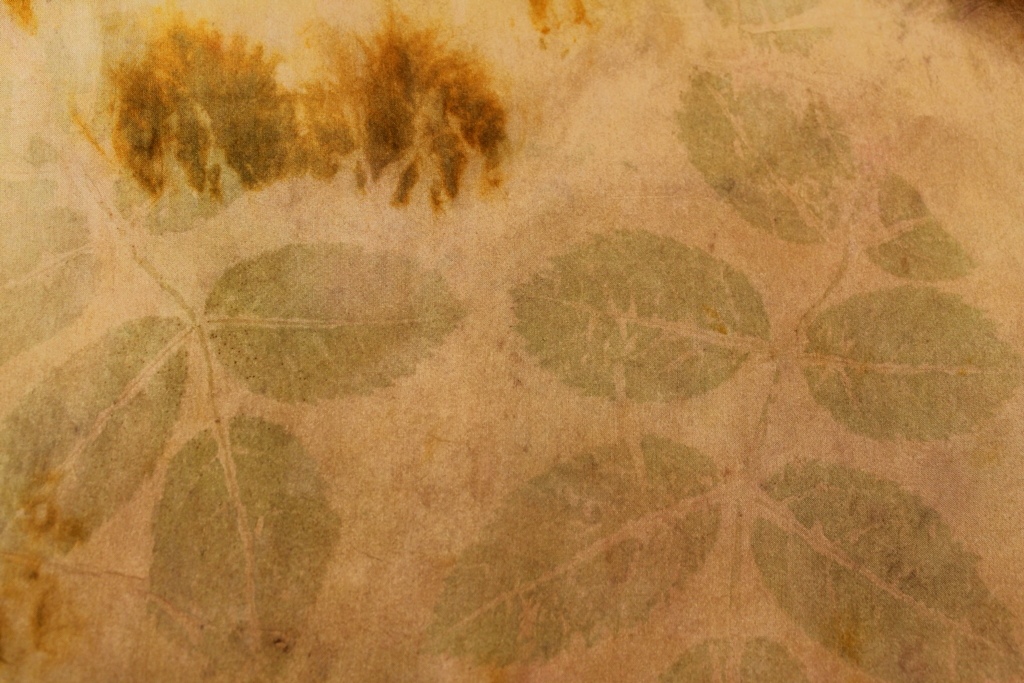
A rose leaf (below) offers a soft yellow to complement the also-soft pink-purple of the bee balm. Strident deep orange-reds sing loud with a powerful dark teal green print from a blue pansy, And an emerald cotinus leaf.

The many contrasts of colour, form and value in these prints keep them from being insipid, don't you think?

And now to the “dark-and-stormies” .

To get really dark prints (black, charcoal, blue-black) from leaves, we need to choose tannin-rich leaves like sumac, oak, walnut, geranium and others and process them with iron bits.I do my D and S's in three stages – three, if I dip the thing in indigo for the last stage.

First stage: Bundle the paper and textile/layer with iron and vinegar to get a good iron print; bundle up the iron chunks and slosh on the white vinegar, 5% acetic acid, no exact proportions. Wrapping the iron or layering it flat works well. No need to alum-mordant; but if you do, no matter. Put the textile or paper with iron between heavy black plastic garbage bags, weighted down, and leave in the sun for a day (or even less if it is very hot outside, say over 30 C. Keep checking…) Leave it to print until you are happy with the result, then unwrap and evaluate. You can add more iron, vinegar, tea leaves and leave it for a while longer if you like.

Second stage: For this stage, I layer on leaves, then I steam the bundle to print the leaves. I layer tannin-rich leaves onto the textile or paper, put the iron bits back in, bundle or stack the package in the dye pot, slosh again with vinegar and process (covered) over high steam heat over water for about an hour. The leaves print blue-black if they are tannin-rich. You may get smidges of yellow or green colouration also. Very nice. I suggest using leaves of contrasting size and shape, like the longer pinnate sumac with the smaller palmate geranium. This kind of attention to shape and size of print elements makes for a more interesting surface design. After all, sooner or later, an artist might like to feel they have some control over the essentially- spontaneous exo print process. Serendipity and considered choices make good partners in design.

Third stage for indigo: Either dribble on a diluted indigo solution from pre- reduced crystals and let dry; or skip this stage and dribble the indigo onto the substrate at Stage Two before steaming.

For good info on using pre-reduced indigo, check out Catherine Ellis' fine PDF via Earth Guild.

NB The indigo I am using at the moment is not the “granola” indigo, i.e., the “haute eco” indigo used by “eco-printerati” which comes from real leaves. MIne Is the synthetic variety, alas, the pre-reduced crystals. But rest assured, Dear Reader, for when my potted Indigo indigofera plant grows big enough, I, too, shall aspire to membership in the aforementioned elite company. And you shall be the first to know. ( And I do have my Japanese indigo in the works, too. )

And now some the pics of the the iron/rust, tannin and indigo prints.

Shlomo cut and welded these iron bits:

The bundle was dribbled and blobbed here and there with indigo: iron bits with tannin from tea leaves.

Other iron bits for the bundles/layers/stacks:

Leaves layered on the textile after the first printing with iron and tea leaves only:

Ready for steam processing: Indigo dribble, tannin marks from some ? leaves in the bundle that printed in the heat of the sun: lots of great rust marks.

Papers and iron stashed under plastic in the hot sun:,

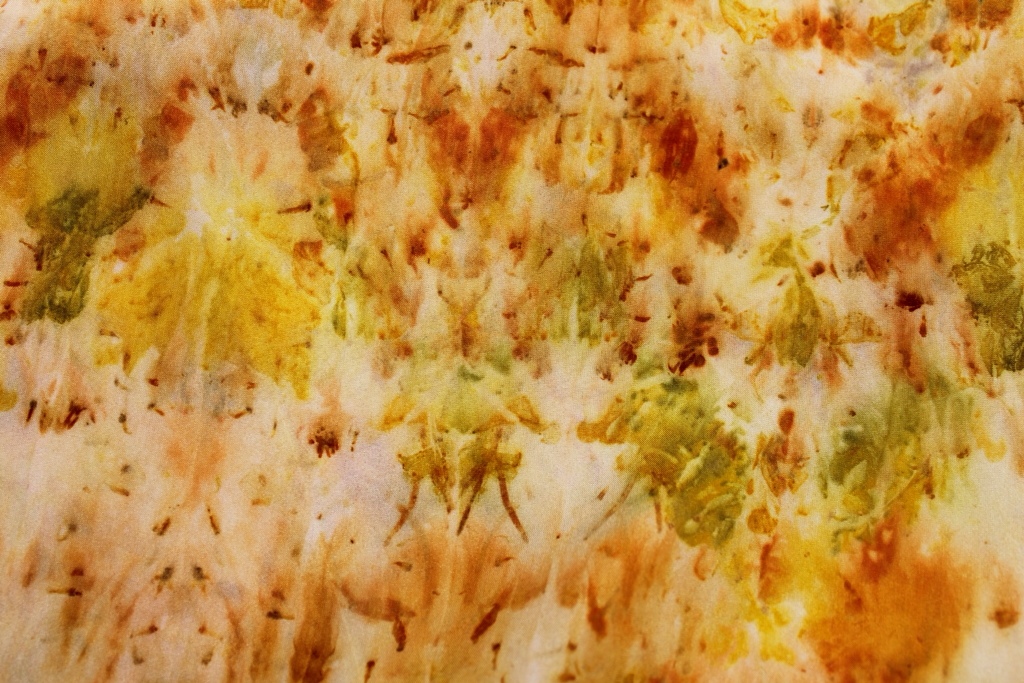
Rust prints on paper with indigo and tannin-rich tea leaves, dry.


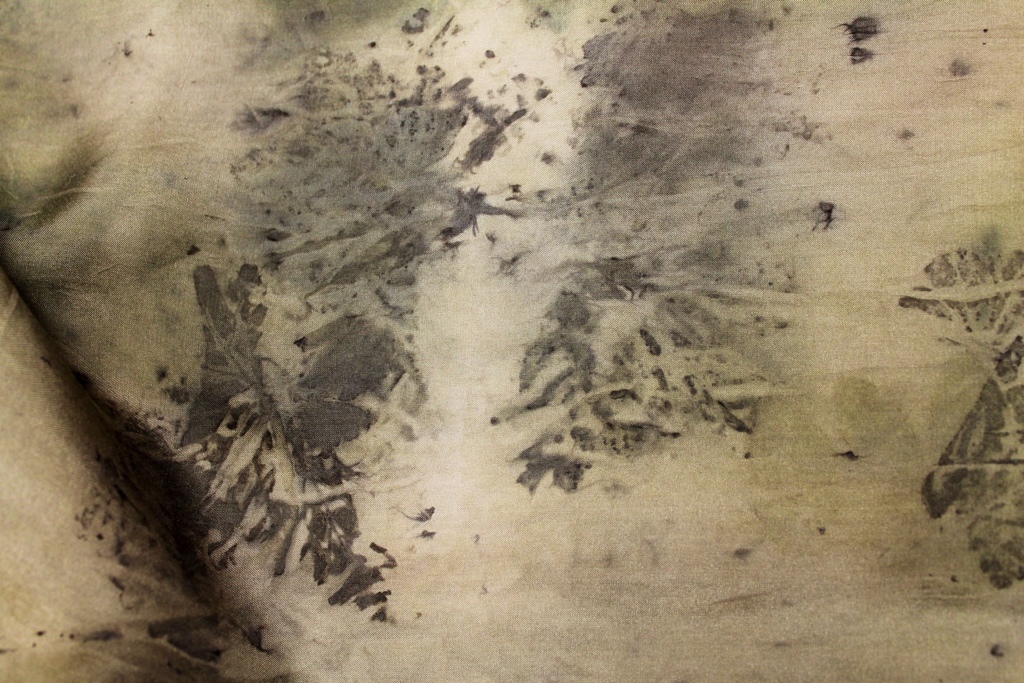
Part of a rust printed textile:

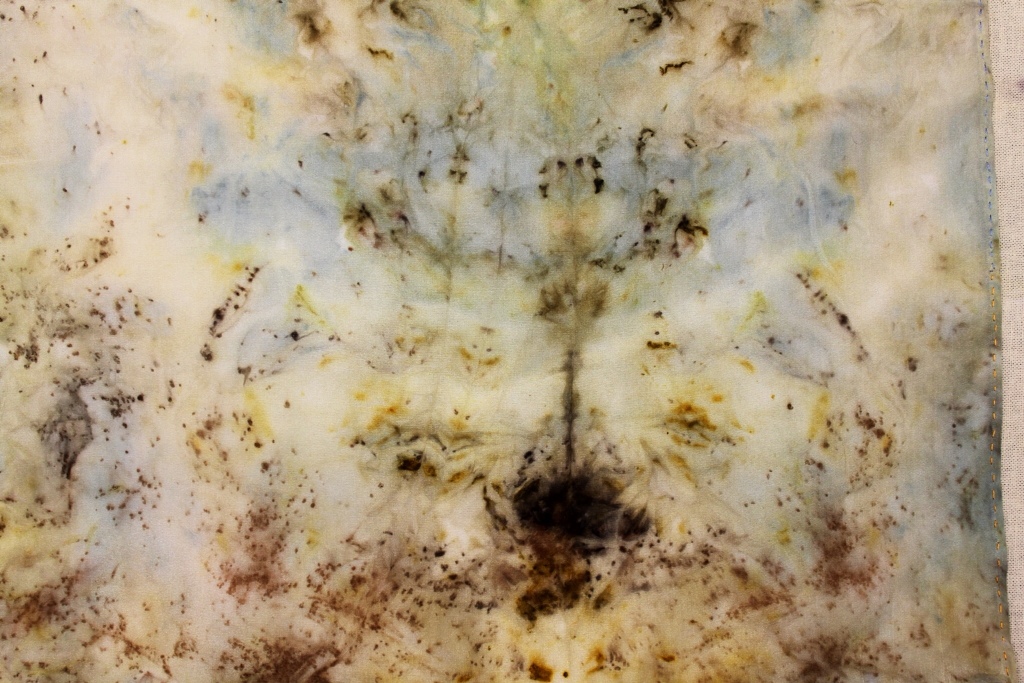
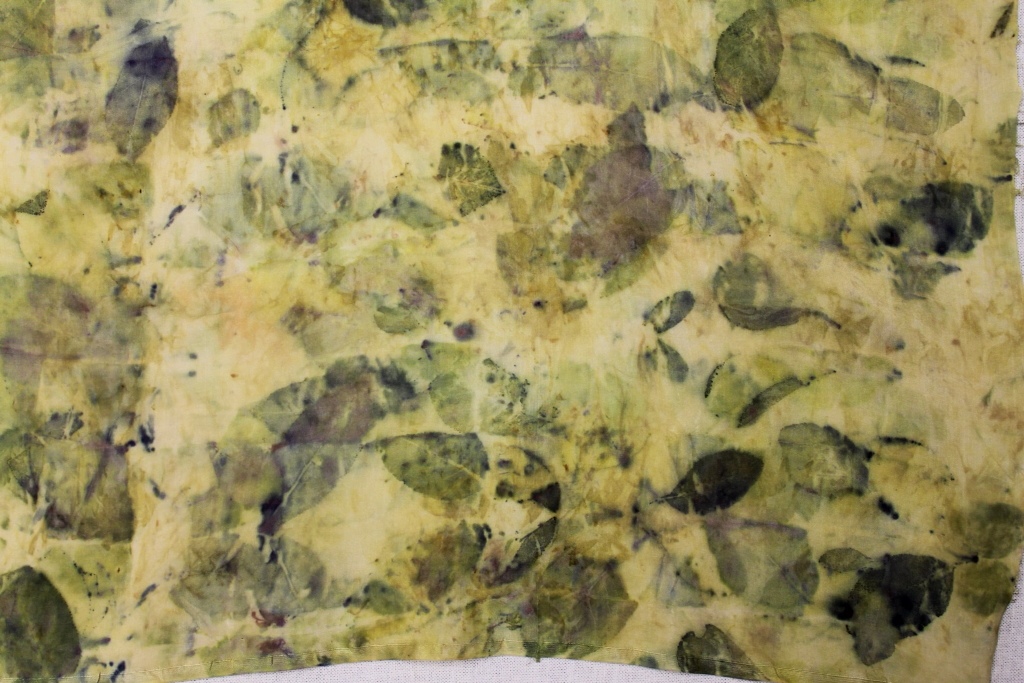
Sumac prints blue-black with iron bits:

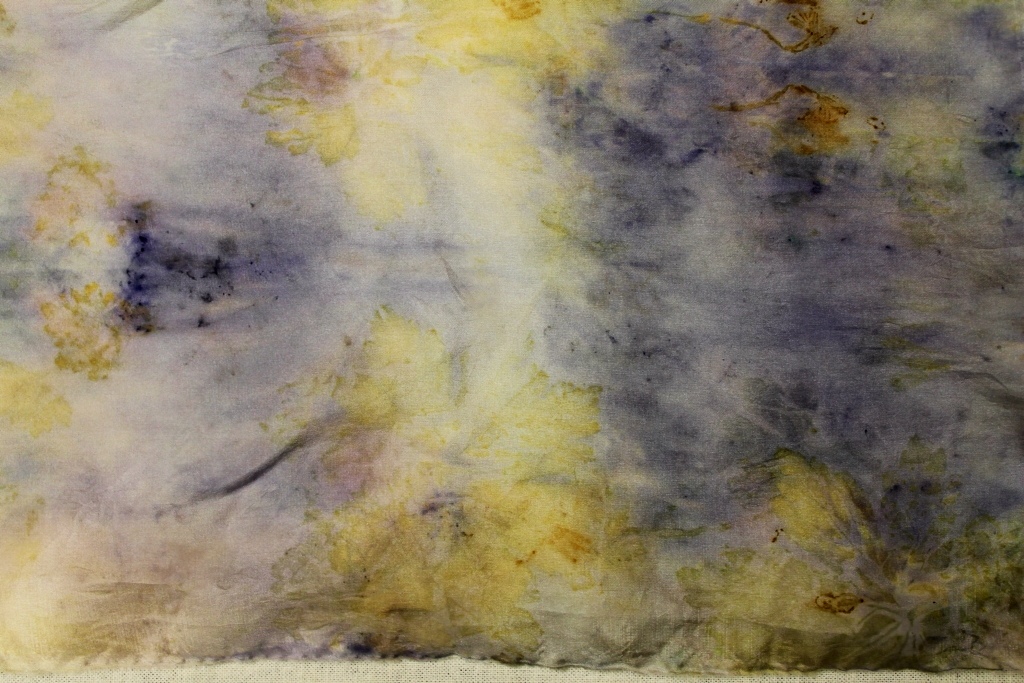
Indigo and rust with tannins and leaf prints:


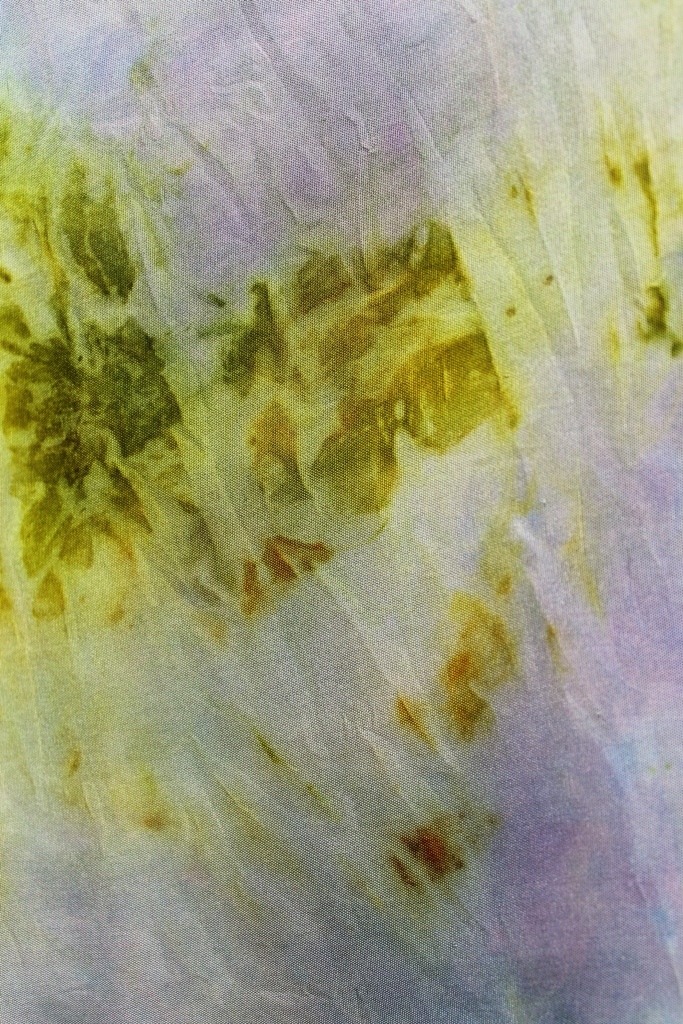
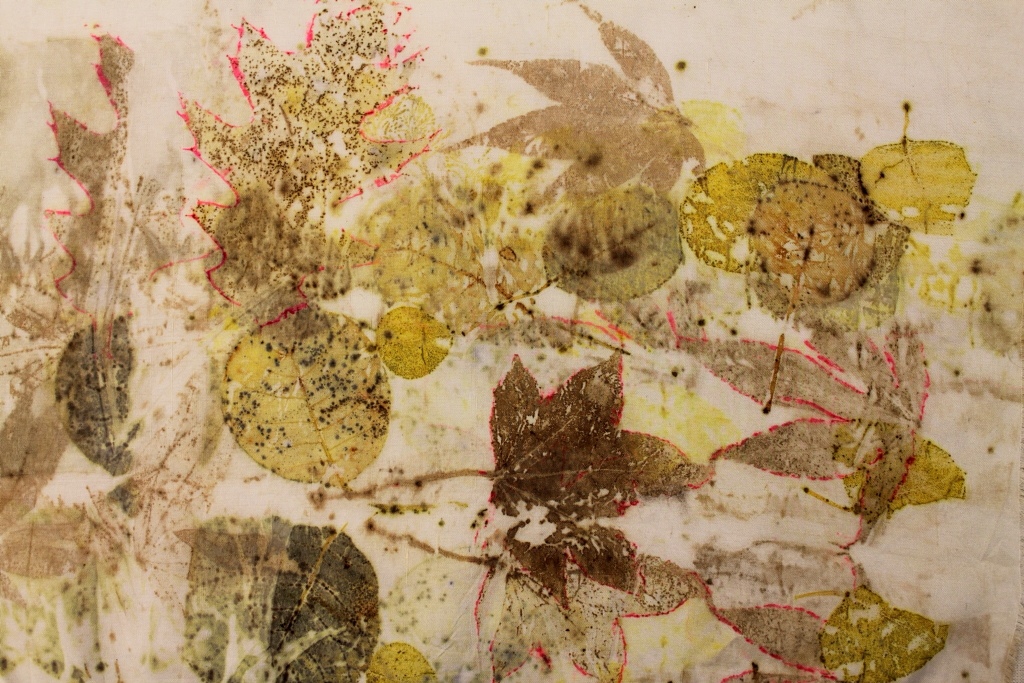
And one last print: Japanese maple and geranium without iron but with indigo. Just the usual eco print process to print the maple and geranium on rice (mulberry) paper, then pre-reduced indigo dribbled on with a bulb baster. The maples printed different colours on rice paper than on linen where ir gave purple and green, And here, different colours from the upper and under side of the leaf.

And that is it for ” July Gardenista” prints, Dear Reader.

We are off to Brooklyn this week for a week to babysit our newest grandbaby! And to give the poor parents a break – little Zev is no sleeper! We may have time for some arty things – the Brooklyn Botanic Garden is nearby…we will not be able to resist a nice walk in the gardens with our little grandson.

Leaving you with one of my faves:

Until August, then.

Wendy


September Goodbyes

Not goodbye to my blog this September but certainly goodbye to the studio and garden at 20W. The Blue Heron came to say farewell:


Spent all of August and September so far sorting, packing, recycling, chucking out:


Of course, I saved a stack or two of this summer's printed textiles for blog pics. July was basically my last month working in the studio, racing to finish eco printing wools for an article in the British “Journal for Weavers, Spinners and Dyers” (www.thejournalforwsd.org.uk); making sure to use up all the iris leaves in my garden to make paper and the frozen irisvblooms to print book pages and cloth; finally, printing up silk that had been soaking for weeks in alum water.

First, the wool ( a recap of last blog post):


Wools eco printed with iron, maples, sumac, coreopsis and prunus cistena. Now for the silks:


Prunus cistena and coreopsis, above.


Rose, marigold, iron, sumac, prunus c.:


Coreopsis verticillata, rhus typhina, “Purple Passion” apple slices:


Rugosa rose, prunus cistena, iron, sumac:


Tagetes, iron, prunus:


Rhus typhina, Coreopsis v., Rosa rugosa:


Tagetes, Prunus cistena, Eucalyptus globulus:


As above, with “Purple Passion” apple slices.


The Story Table.

Witness to the spinning and weaving of many life-tales ( and plenty of unravelling, too) this (five-dollar) school library table was rescued and gifted to us 40 years ago…Oh, it has seen and heard many a story…For the new house, it will get a face lift but it will always remain our communion table:


Here we all are, as we are on Labour Day 2013, saying goodbye after a final meal as a family in our home of 35 years and celebrating our 40th wedding anniversary.

Clockwise from the tallest: Shlomo, Shannon, Sarah, Scott, Hannah, Matthew and Wendy. Seated ( L to R) : Nemo the Lab, Dylan, Noah, Layla.


Next up? Making art in Umbria, Italy!

Off to spend the month of October experimenting with the dye properties of plants in Umbria along with bookbinding traditions there as well as papermaking…Will be posting from Mount Subasio near Assisi.

Arrividerci!


Forest Floor

Getting ready for my show “Forest Floor”, July 29 – August 28, 2012 at the Shenkman Arts Centre, in the Trinity Gallery, City of Ottawa. I will be displaying eco printed art cloth and paper.

First up is a collection of ten eco prints on watercolour paper, variously sized: 8″x 10″, 9″x 12″, 11″ x 14″ and some irregular. The leaves were collected and printed in fall 2011. The colours remain vibrant, and some have even developed further depth. One of my research questions last year concerned print longevity. I am satisfied with these results and feel comfortable offering then to the public.

1. Cotinus coggygria, chokecherry, Japanese Maple, ginkgo


2. Blackberry, marigold (tagetes), catalpa pod


3. Alder, Japanese Maple, ginkgo, blackberry

4. Cotinus c., Japanese Maple, ginkgo, alder


5. Sweet Gum, Japanese Maple, ginkgo, cotinus c.,


7. Sweet Gum, Japanese Maple, cotinus coggygria


8.Sweet Gum, Japanese Maple, cotinus coggygria


9.Sweet Gum, Japanese Maple, cotinus coggygria, alder.


10.Sweet Gum, Japanese Maple, cotinus coggygria, alder.


Also in July, two of my embroidered art pieces purchased by the City of Ottawa will be on display at city hall in the City of Ottawa Gallery, Permanent Collection. Pics next post!

Thanks for following


WEndy


Eco printing the chuppah 5

My garden (the one the Bride grew up loving, but, er, not actually ever having worked in) has supplied all the plant materials (except Sweet Gum and Japanese Maple) for this collection of eco prints which were completed mostly last summer and fall. Some dried and frozen plant materials have been printed this winter. The USDA zone for an Ottawa garden is 4 while Canadian zone classification puts it at 5A, so taking garden micro-climates into account, one can make reasonable guesses about the range of dye plants comfortable here.

Sumac berries bundled in silk habotai


Rose leaves and tagetes marigold on lichen dyed vintage kimono silk fragment

Perennial geranium on silk habotai
Perennial geranium on silk habotai, modified by iron


Coreopsis verticillata (reds)and tagetes marigold calices and petals (greens and yellows) on silk habotai

Perennial geranium (yellow-greens), Golden Rod (yellows) and Red Cabbage (blues) on rusted silk habotai
Red Cabbage (blues) and tagetes marigold petals and calices (oranges and greens resp.) on silk habotai
Orange pekoe tea (blacks and browns), rooibos tea(rusts), safflower petals (yellows), Red Cabbage (blues) on silk habotai. All from the grocery store.
Purple Sandcherry and Purple Basil on silk broadcloth. Blues and greens.
Oak, Japanese Maple, Sweet Gum, Cotinus Coggygria (dark greens) and eucalyptus cinerea “Silver Dollar” (yellows) on silk broadcloth. No idea where that pink came from.


Note on the colours: I used a Canon Rebel SLR set at fully automatic, then the “enhance” in iPad photo edits. I find the colours very true to life.

Next time: If my new computer arrives this week, I can share some pics of the garden from last summer and fall. It is hidden under snow right now.

Eco prints on silk with eucalyptus, Rooibos tea, Red Cabbage and fall leaves

This time my eco prints are on some longer pieces of silk charmeuse, silk and wool mixture (80-20) and a small piece of silk twill.  Two lengths of  silk – wool, 24″ x 100″ were pre-mordanted in 25% alum , and the charmeuse and twill were post-dye mordanted in a 25% alum bath…am hoping for the best because I made a mistake in thinking that these two had been pre- mordnated. The collection:

From the left: 1. Sweet Gum and Japanese Maples on silk twill; 2. “Silver Dollar” eucalyptus on silk-wool mix bundled over cherry branches; 3. Red Cabbage, Rooibos tea, blackberry vine and leaves, dried tagetes petals and black tea (Taylor’s of Harrogate “Bungalow” blend) on silk-wool bundled over some very old iron rebar 4. Japanese Maple, Cotinus Coggygria, Sweet Gum and red Chokecherry bundled over copper. All steamed for at least an hour; the eucalyptus bundle was steamed for over three hours.

Some close ups and some details:

The sought-after reds from eucalyptus have arrived here in small measure, in stripes, outlines and spots here and there, adding sparkle and vivacity to the oranges and chartreuses of the leaf and stem prints, as touches of red are wont to do. I used the whole eucalyptus branch (from the florist) and like how it looks printed, better, in fact, than  isolated ovals printed from leaves torn from the stem . 

But to obtain red prints of the whole branch? My understanding is that I need  to soak the leaves several days before printing them; to use dry as opposed to fresh leaves; and to be patient while they cook, under steam or in a dye bath of water. Longer than other leaves…that means over two hours, for sure. Next time.  Meanwhile, chartreuse and orange with just splashes of red will do nicely:

I love the broken-up look of the leaf prints here. That effect comes from how I folded the cloth over the branches. I like how the red dye has drawn lines around the oranges and yellow-greens of the eucalyptus leaves in places and filled in small parts  of the print but without colour blocking the whole area. More Monet than Morris again!

I scrunched up the length of silk to get the photo – I like it better than the long “table shot”. You can see the incredible variety in the marks made by the dye stuffs and know that no two areas will show the same sets of marks or colours. Blues from the cabbage, greens from the marigold mixing with the cabbage; greens from the blackberry; rusty brown red from the Rooibos tea; blacks and dark greys from the black tea and the iron rebar; yellows and oranges from the dried tagetes petals, of course.

A couple of detail shots:

Great detail of the blackberry and the iron rebar.

Rooibos (“Red Bush” in Afrikaans), red cabbage and tagetes meet and mingle.

A range of gentle blues and greys from Japanese Maple, soft browns and ochres from Sweet Gum and more blues from Cotinus Coggygryia (I think I have misspelled that last word a hundred times in this blog – just can;t make it stick in my head… better stick with “Smokebush”… I can spell that…)

And a detail:

The darker blue values are from Chokecherry leaves (burgundy red all year) and the darker browns from Sweet Gum.

Next post: More eco prints on watercolour paper.

Honour Roll for this post:

Why, India Flint of course, the Great Queen of Eucalyptus Dye lore.  Her book on eco prints has taken me on this fascinating journey of discovery.

prophet-of-bloom.blogspot.com/

More eco prints with golden rod, marigolds and maple leaves on vintage linen

The fields and ditches of Ontario were yellow with Golden Rod in late September. How not to pick some? A trip of some 700 kilometers and acres and acres of gold like this to look at:

 An armful of Golden Rod gathered from beside the road and a potful of (park) marigolds, deadheaded, gave  plant materials for immersion dye baths as separate colours and mixed. Most dye authors advise that it is OK to mix any yellow dyes and so I tried it with my vintage tablecloths described in these October posts. I wanted to try eco prints on both coloured textiles and white ones. So far, I have eco printed only naturally dyed textiles, the ones I have dyed myself using garden or foraged plants.

Golden Rod can be used a few times to extract dye. This batch of linen was dyed with a mix of marigold and golden rod colours. For one contact print with the Golden Rod plant, I first dyed the vintage linen in a long cool soak in a Golden Rod/marigold mix dye. I left the cloth for two weeks in the dye bucket while I was busy with an art show.  Then I used the cooked Golden Rod material for the contact print. For a second contact print on another vintage cloth, I laid out fresh Golden Rod on white linen :

 After dyeing and /or eco printing a couple of times with the Golden Rod, a began using maple and other leaves to obtain another layer of prints:  there are lots of images! They continue to show the linen panels in my “Forest Floor” series:

1. A broken, layered image of a maple leaf. I like the “incomplete” effect. And the white damask woven motifs reflect the light. Another layer of interest to exploit for meaningful content in the art work.

2. Delicate. Ephemeral. Fragile. Like the linen.

3. A transparent effect to the marks in this one.

4.  More broken marks – and a water colour effect

5. Marks of  a  memory of a leaf

6.  Somehow,  a bird flew in…

7. Golden yellow and dark brown marks from a red and green leaf…

8. Swirls of marks. The dark brown pointillist effects are from the Korean pear leaf, wearing red and brown for Fall.

Other marks and colour effects

To some vintage linen panels (dyed and printed as above and as shown in the previous day’s post) I added a tablespoon of iron liquor (rusty nails in 5% vinegar) to shift the colours to grey-green, and a dropperful (dropped here and there on the textile) of copper sulphate (copper pipe bits in 5% vinegar)  to shift the hue towards a brighter green, as in these four examples:

1.Interesting variations – I like the splashes of yellows (copper) and the greying (iron) of the pointillist marks

2. You can see a leaf print in the top left corner…the iron gave the damask a look of well-shone  pewter, a warm , low sheen. Delicious, silky, touchable.

3. Another layer of marks and colour to add interest4. Another view of the previous iron-modified eco print:

Eco prints from other plants

Now an eco print made with Fall asters (Michaelmas Daisies) and red marigolds on Golden Rod-marigold dyed linen: first the dye, then the ecoprint, as before.  Note that the greens (below) are quite different from the green-yellows of the previously- shown prints. These greens come from the calix of the marigold. Rather more green comes from the calix here than orange from the flower petals. Is that because these flowers are day-length and temperature sensitive? In July, the orange is far more assertive than the green. In October, green rules! I understand from my studies that frost-touched marigolds give spectacular colours. I am looking forward to the frost – only for that. The bright yellows in this eco print are from the Fall asters: 

And here are some images of the flowers used for this eco print:

Red mari

…and asters, pink and purple:

“Aster” means “star”

Last pics in this series of eco prints on vintage linen are of oak leaves. Hmm. I will have to try these again and maybe other kinds of oak – these leaves were large and very green and waxy…but I did NOT get a good impression or colour transfer… so that is a fine challenge for future dye experiments. Meanwhile:

Oak leaves eco print

 I photoshopped this image to crank up the contrasts;  it is much less distinct in reality:

More oak eco print on vintage linen, as before, pre dyed with marigold and Golden Rod:

 I used nine oak leaves for the eco print but only two (above) made any impression. Next time, I will ensure that each leaf is in tight contact with the textile surfaces when I steam the bundle.

Walnut leaf eco print on mari-Golden Rod dyed vintage linen (another image photoshopped o improve the contrast):

Last note: Here is the whole “Forest Floor” collection of eight vintage linen panels. During the winter ( o those long cold snowy nights without dye plants to gather…) I hope to  be stitching some of them, taking them to the next stage of cloth as memory and pilgrimage.

Next dye sessions will be with more Fall plants and on silk as well as vintage linen;  some experiments with walnuts;  some eco prints on paper and some preliminary stitch work on the eco printed panels I have done this summer and fall.

Wendy

Eco printing with maple leaves on vintage linen

Some serious stash busting today. Two lovely white vintage damask tablecloths  woven with leaf and chrysanthemum flower motifs entered the dye pots and emerged as new creations.  Maple leaves and walnuts were the main plants I collected today, the nuts for another day of dyeing, and the leaves for an eco print. Here is the grove where I collected the nuts: even though it is Fall, we see hardly any loss of green leaves yet!

Before gathering the walnuts, though, I first had to pay my respects to this venerable Tree Soul in the walnut grove:

Today was maple leaf print day – from the Silver Maple tree in my garden :

I scanned these leaves to show you which colours  I chose  for the eco prints today.  So many colour surprises on the textile later, even when all the vintage linen was treated the same way and the leaves were similar shades.

To prepare my linen for eco printing, I pre -mordanted it in alum as usual, tore my tablecloths it into eight long strips,  dropped the strips  into a prepared dye bath of tagetes marigold and golden rod mixed and left the cloth in the cool bath for a couple of days in the sun to take up the colour. No other heat was applied.

As usual, I strewed the plant material over the surface of the textile, rolled it up tightly over a stick, bound the bundles with string and elastic bands, placed them (two or three at a time)  in the steamer pot over boiling water and steamed the bundles for an hour or so – or until I saw a lot of colour.

In the marigold-golden rod immersion dye bath, I find that linen dyes paler yellow than silk but darker than cotton.  The damask motifs often show darker yellow than the background linen so their pattern become more prominent yet still contributes harmoniously to the overall surface design along with the eco printed leaves. 

Some of the eco prints are very precise clear,  many are diffuse. That is the combination I like best for I an seeking a multi-layered look that communicates mystery, depth, ambiguity, subtlety… More  Monet than Morris. This series of cloths is entitled “Forest Floor”. When leaves fall to the ground in layers beneath the trees of the forest, some retain their forms for a long time while  others disintegrate beyond recognition very soon, in the eternal cycle of birth, death and regeneration. This is the world of insight and feeling I want to communicate in these pieces.

There are a lot of eco print images today – it was hard to choose only a few!

Fall leaves on vintage damask linen:

1. Some Korean pear fall leaves (also red) with the red maple leaves: 

 Green, brown, turquoise, even blue  eco prints!

2. Different areas of the same textile print different colours:

3. The damask motif shows beautifully with the eco printed maple leaf.

4. Layered effects in the eco prints and the damask motifs

5. I find the variety of colours and forms and marks obtained from the leaves is astonishing; thus every area of the textile surface tells a new story and nothing is ever repeated. I suppose the different concentrations of fall tannins in each leaf in contact with the dyed and mordanted cloth is responsible for the uniqueness of each print. 

6. This leaf printed at the edge of the cloth. I like the spotty-dotty effect of the broken surface eco print.

7. Beautiful layering, broken edges, diffuse forms…more Monet, less Morris in  printing technique.

8. The fragility of the vintage textile informs and confirms feeling in  “Forest Floor”

This print recalle a sepia tint photo. Amazing that such a variety of colours and forms appears in the prints despite using the same dye, mordant and textile for the printing surface. Although I do not know that history of the tablecloths…naturally they will have different laundry history that will affect dye take up. Think of the meals and the guests at the table over the years…

Enough for today. More images of maple leaf eco prints tomorrow if I have time.

Wendy

October Eco Printing: Golden Rod and Tagetes Marigold on vintage cloth

My stash is continuing to provide fibres for my dye pots. Stash busting was my goal for this year and that is how I happened on eco printing and natural dyeing. What to do with all those luscious vintage linens and cottons from my ever-expanding hoard?  And as one fibre art friend remarked: And now you have a new stash…

Indeed.

Here is the fruit of one October dye pot: a mix of marigold (tagetes)  and Golden Rod dyes, combined in a bucket and, for a few weeks at the end of September, where it became home to some of my pre-alum-mordanted vintage cloth while I was too busy to dye on the hot plate.

 White to start with, lace-trimmed cotton and embroidered linen – plus a small twist of silk embroidery thread.  Amounts of dye? Whatever!…This is about “What If I try….???”

The colours are three shades of chartreuse with the darkest colour on the (unmordanted) silk thread and the lightest on the cotton. I had to scan the textiles in to get an image close in colour to the original. The scanned image, while much better than the one from my Point and Shoot, still does not do justice to those luscious yellow-greens.

Here is what the dye pots looked like while the cloth was brewing away in the sunshine on my deck:

On the right is the marigold- golden rod mix dye; on the left is the marigold alone. Note the fall leaves on the deck…While I was away the lids blew off the buckets and some leaves fell in the brew…so who knows what they added to the colours?

This is the GoldenRod still in the dye pot, cooked out and left to extract more colour but not drained…note the mould. Some dye authors say to just sweep off the mould and heat up the dye again..which I am about to do.

And here is Mouldy Goldy – the golden rod blooms are still yellow and leaves are still green even after cooking out and soaking, ignored and neglected for more than two weeks. Andf they still smell lovely.

Next post about these linens will show some eco printing!

September eco printing: marigolds, sumac, golden rod and associates

Detail pics of textiles eco dyed and printed this month and late last month. Dye stuffs from tagetes marigolds were plentiful so there are lots of yellows and oranges. Red cabbage, eucalyptus, red sumac berries, fresh bay leaves and golden rod offered interesting  variations to marigold colours. Note that eucalyptus gave a yellow overall (immersion) dye but pinks and reds as contact prints in an eco bundle. See Image # 4, below for the contact print.

1. Orange-yellows from marigold petals, greens from the marigold calix and violet from red cabbage.

2. Mixed yellow bloom eco prints  (anthemis, coreopsis, marigold)  modified with iron liquor (rusty nails in vinegar) by splashing areas. 

 3. Detail: Coreopsis verticillata, dried and fresh, bundled in alum-mordanted silk habotai (8 mm) and steamed for an hour.

4. Detail: Eco bundles with eucalyptus  (pinks), tagetes (oranges) , purple sandcherry (blues), purple basil (blues, purples) and fresh bay leaf eco print on silk.  The burned area? I cooked this bundle in the microwave but failed to wet the plants and the textile sufficiently…the bay leaves dried up fast (they are not very absorbant) and caught fire…NOT a recommended practice at 3 a.m. in the morning…But the series of burn marks all through the bundle looks great.

 5. Detail: Tagetes marigold (oranges ), eucalyptus (pinks) eco print on silk

6. Detail: Fig leaf (blue!) and mixed yellow blooms (coreopsis, anthemis, Black Eyed Susans) for yellow dyes on eco bundled vintage linen. Blue fig eco print? A nice surprise. I do not know the laundry history of this textile-and this is a principal allure of eco printing on vintage textiles

7. Detail: Golden Rod (whole plant) eco print on silk: greens from the leaves; yellows from the blooms.

8. Detail: Eco bundled tagetes marigold (orange from petals and green from calix) and coreopsis verticillata (red-orange) on silk .

 9. Detail: Silk, first dyed all over (immersion dye bath) with tagetes mari for a lighter yellow; then eco bundled and steamed with marigold blossoms to give darker orange areas. 

10. Detail: Eco bundled tagetes mari (deep orange) and purple sandcherry (blue) on vintage linen-cotton mix.

Notes: This vintage linen is well scoured and conditioned for dyeing by its history of much use!  I soaked it in alum and tannin (from sumac leaves) for good measure. Vintage linens take natural dyes better than newer linens because they are well scoured. Linen’s reputation for being hard to dye is perhaps more applicable to linens not previously laundered or prepared for dyeing. Vintage linens with a unknown laundry history will dye in unexpected ways: that is their allure! 

11. This (well scoured, new) silk noil panel was eco bundled with tagetes mari (orange) and purple basil (blue-violet). 

12. Detail: Tagetes mari (orange-yellow), dried rose petals (grey-brown mottling); rose leaf (green) eco bundled in vintage handwoven refectory linen (from a monastery).  The start of some handstitching – more of  that after the garden season is over in  Zone 4, Ottawa, Ontario!

13. Detail: Lost my notes on this textile!  But the greys are likely the result of an iron modifier on a yellow dye – from lichen, maybe,  or even from one of the fruit tree (prunus) barks I tried in the early summer. Sometimes I get too excited to and forget to write stuff down. A lovely print, I think, though.

14. Detail: Silk eco bundled with pear leaf (some leaves turned red early) , tagetes mari and purple sandcherry leaf: Brown-green, yellow-orange and blue-violet prints,  respectively. I like the dotty-mottles on the pear leaf contact print.

 15. Detail: Mixed eucalyptus leaves (from the florist – this is one plant I did not grow myself!) with tagetes marigold, giving shades of yellow then modified with iron to give shades of browns, greys and blue-greys . This is one of my favourites! Thank you, India Flint, for sharing your knowledge about eucalyptus dyes – and everything else. India’s work  (see link in my Blogroll at left) inspired my 2011 summer’s work.


16. Detail: An eye-popping combo from red sumac berries (pinks and reds) on BlackEyed Susan eco print and dye (greens),  in a lumpy eco bundle with silk habotai (8mm). The tiny red berries print little dots and circles and blobs.